
JUMP TO A SECTION
When a metal roof leaks, the instinct is to blame the metal. It is usually the wrong suspect. A metal panel is a single continuous sheet with nowhere for water to get through unless something interrupts it, a hole for a pipe, a fastener driven through the face, a seam where two materials meet. Those interruption points, not the panel field, are where the water almost always gets in. This guide ranks the real leak sources in the order we find them, from the most common down to the least, and walks through what a proper leak diagnosis looks like so you are not paying to fix the wrong thing.
If water is actively coming in right now, the priority is stopping it, not diagnosing it. We offer 24/7 emergency tarping to protect the interior while the real source gets found and repaired properly, often the same week.
01 / THE SHORT ANSWERThe panel is rarely the problem
Ranked roughly in the order we see them across Macomb County metal roofs, the real leak sources are penetrations and pipe boots, failed sealant and fastener gaskets, flashing transitions at chimneys and side walls, and winter ice backup working under the panels at the eaves. A pinhole rusted through the field of an otherwise sound panel is possible, but it is far down the list and usually shows up only on very old or improperly coated metal. Most leaks trace to something attached to or penetrating the panel, not the panel sheet itself.
Penetrations and boots come first because every one of them is a hole cut into the panel on purpose, sealed by a part with a shorter service life than the metal around it. Sealants and gaskets follow because they are the maintenance items that age out on a schedule. Flashing at chimneys and walls comes next because it depends on a second material meeting the metal correctly. Ice backup at the eaves is last on this list but first on the calendar in a Michigan winter, since it can force water uphill under panels that have no other flaw at all.
02 / SUSPECT ONEPenetrations and pipe boots
Every vent stack, exhaust flue, and roof-mounted fixture needs a hole cut through the panel, and every one of those holes is sealed by a boot or a manufactured flashing piece rather than by the metal itself. Rubber pipe boots are the shortest-lived part of the whole assembly. The rubber dries out and splits over years of sun and freeze-thaw, and once it cracks, every rain finds the gap and runs straight down the pipe into the attic below. On a metal roof, a boot is often paired with a metal storm collar and sealant rather than sitting flush the way it can on shingles, and any gap at that collar behaves the same as a cracked boot.
Skylights, satellite mounts, and solar standoffs are the same category with a different shape. Anything bolted through a metal panel after the fact needs its own flashing and sealant detail, and an add-on installed by someone other than the roofing crew is a common source of a leak that shows up months or years after the roof itself was installed correctly.
Add-ons installed after the roof was finished
A satellite dish mount, a solar panel standoff, or a security camera bracket added years after the roof went on rarely gets the same flashing detail a roofer would build into the original install. A lag bolt driven through a panel and sealed with a bead of caulk is not the same thing as a properly flashed penetration, and that caulk-only fix has a service life measured in a few seasons, not decades. If a leak appeared sometime after an add-on was mounted, that fixture is one of the first places worth checking, whether or not the person who mounted it was a roofer.
Vent stack storm collars
On many metal roofs the pipe boot is paired with a metal storm collar that clamps around the pipe above the boot and is sealed with a bead of sealant where it meets the pipe. That sealant joint ages the same way any exposed sealant does, and a gap at the collar lets water run down the outside of the pipe, past the boot, and into the same hole the boot was supposed to protect. Checking the collar separately from the boot itself is a step an inspection worth paying for does not skip.
03 / SUSPECT TWOFailed sealant and fastener gaskets
On an exposed fastener metal roof, every screw driven through the panel face sits under a rubber or neoprene washer, and that washer is doing the actual waterproofing, not the screw threads. Ultraviolet exposure and freeze-thaw cycling harden and crack those washers over years, and once a washer is stiff and split, retightening the screw does not restore the seal. Our exposed fastener problems guide covers the full failure sequence, from backed-out screws to elongated holes, in more depth.
Side laps, where one panel edge overlaps the next, rely on factory tape or field-applied sealant that ages the same way. A side-lap leak tends to show up as a line of water following the seam rather than a single point, which is one of the clues that separates it from a penetration leak. Standing seam systems avoid the exposed screw problem entirely by using concealed clips, but they still have sealant at end laps, ridge caps, and transition trims that can age out and needs the same periodic check.
Standing seam is not immune, just different
A standing seam roof avoids the through-panel screw by holding panels with concealed clips under a folded seam, which removes the fastener gasket failure entirely. It still has sealant at end laps where a panel run terminates, at ridge caps, and at trim transitions around penetrations, and those joints age the same way any exposed sealant does under Michigan sun and freeze-thaw. The lesson holds across both systems: wherever a sealant or gasket is doing the waterproofing instead of the metal itself, that joint has a shorter service life than the panel and needs to be checked on a schedule, not assumed permanent because the roof is premium.
If a repair cannot tell you which detail failed, the boot, the gasket, the flashing, or the ice, it is a guess with a price tag, not a diagnosis.
04 / SUSPECT THREEFlashing at chimneys and side walls
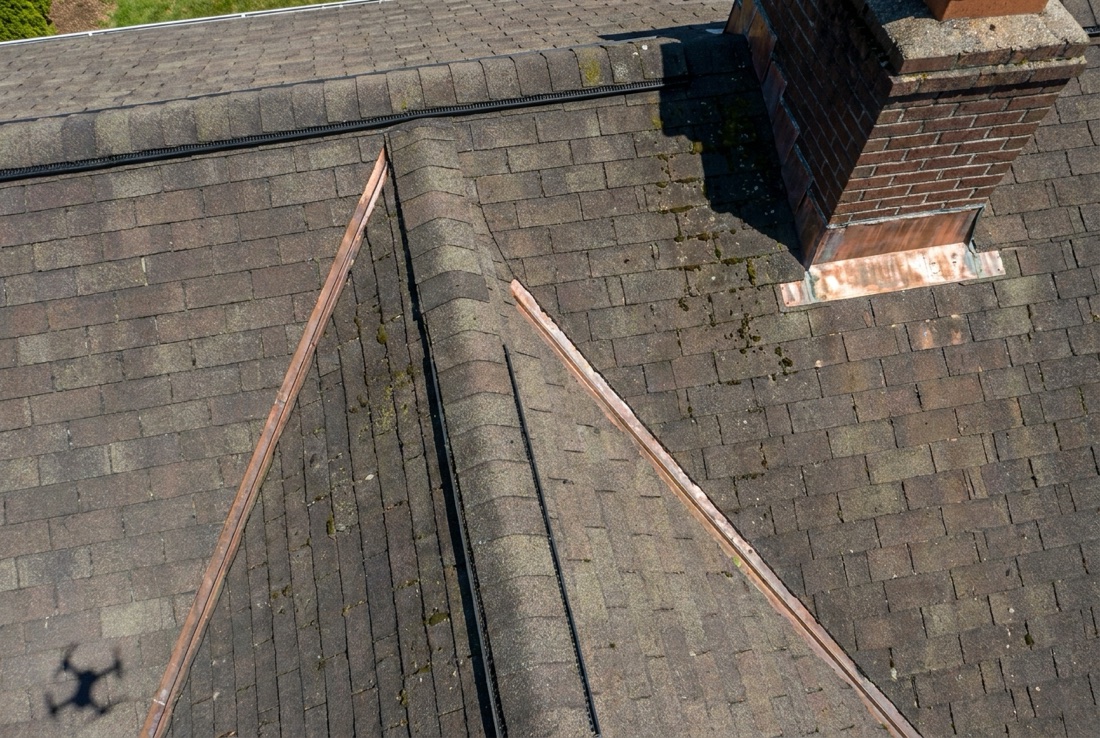
A chimney or a side wall meeting a metal roof needs step flashing and counter flashing to shed water past the joint, and this is a transition between two different materials, brick or siding on one side, metal panel on the other, that has to be built and sealed correctly. Older step flashing that has pulled away, or a masonry counter-flashing reglet where the sealant has dried and cracked, lets water track behind the flashing and down into the wall or ceiling cavity below.
These transition leaks are some of the trickiest to trace because the water entry point and the interior stain can be several feet apart, running along the underside of the deck or down a rafter before it shows up. A chimney flashing leak often gets blamed on the chimney itself, or on the panels nearby, when the actual failure is the flashing detail bridging the two. Rebuilding that detail properly, not just recaulking over it, is what makes the fix hold through the next freeze-thaw cycle.
Masonry reglets and counter-flashing
Where counter-flashing ties into a chimney or a masonry parapet, it usually sits in a cut reglet, a groove tooled into the mortar joint, sealed with a masonry-rated sealant that is a different product than the sealants used on the metal side of the joint. That mortar joint sealant has its own aging clock, and a reglet that has cracked open lets water behind the counter-flashing entirely, bypassing the flashing detail no matter how sound the metal-side work is. A leak that seems to track along a chimney's mortar line rather than down from the roof deck is a signal to check the reglet specifically, not just the visible flashing metal.
Side wall step flashing
Where a roof plane runs into a vertical side wall, a home addition, a dormer, a garage tie-in, step flashing has to be woven in with the siding above it, one piece per course, so water sheds over each successive piece rather than behind it. Step flashing installed too shallow, caulked in place instead of properly woven, or damaged by later siding work is a common and often overlooked leak source at exactly this kind of transition, and it is frequently the culprit when a stain shows up along an interior wall rather than on a ceiling.
05 / SUSPECT FOURWinter ice backup at the eaves
Macomb County winters build ice dams at the eaves when heat escaping from the attic melts snow higher on the roof, which then refreezes at the colder overhang. The ice dam ponds meltwater behind it, and that ponded water can work backward under panel laps and fastener rows at the eave that were never designed to hold standing water uphill against gravity. This is not a defect in the panel or the install. It is a seasonal condition that can expose a marginal detail at the eave that would otherwise never see a drop of water.
A metal roof with proper ice barrier underlayment at the eaves and correct attic ventilation resists this far better than one without, because the real fix for ice backup is stopping the attic heat loss that creates the dam in the first place, not just sealing the eave harder. If interior stains show up specifically after a winter thaw rather than during a normal rain, ice backup is a strong candidate, and it usually points to a ventilation or insulation gap worth solving before the following winter.
Why prevention beats a reactive fix here
Unlike a cracked boot or an aged gasket, an eave leak from ice backup is not fixed by replacing a single failed part, because nothing at the eave necessarily failed. The ice dam formed because heat escaped upward through the ceiling and attic and warmed the roof deck above freezing while the overhang stayed cold, and that heat loss is a building-envelope issue, insulation depth, air sealing at penetrations into the attic, and balanced soffit-to-ridge ventilation, more than a roofing issue. Ice barrier underlayment at the eave buys protection against a dam that still forms, but stopping the dam from forming in the first place is the more durable fix, and it usually costs less over several winters than repeatedly chasing the same eave leak.
06 / THE DIAGNOSISWhat a real leak diagnosis looks like
Water rarely drips straight down from where it entered. It runs along the underside of the deck, follows a rafter, and shows up on a ceiling or wall well away from the actual failure. A diagnosis that only looks at the interior stain and guesses upward is how a repair ends up fixing the wrong spot. A proper inspection starts on the roof, working down the ranked list above, penetrations first, then sealant and gaskets, then flashing transitions, then the eave detail, and cross-checks what is found against the attic side, where the water trail up top usually confirms or rules out each candidate.
| CLUE | LIKELY SOURCE |
|---|---|
| Stain appears only during or right after rain, near a vent stack | Pipe boot or penetration flashing |
| Water follows a straight line along a panel seam | Side-lap sealant or fastener gasket |
| Stain near a chimney or where the roof meets a wall | Step or counter flashing |
| Stain appears mainly after a winter thaw | Ice backup at the eave |
Once the true entry point is confirmed, the fix is targeted to that detail rather than a blanket recoat or a fresh layer of sealant smeared over the whole roof, which almost never solves anything and can trap moisture underneath. Most metal roof leak repairs, a boot replacement, a re-lapped seam, a rebuilt flashing detail, run in the standard $350 to $3,200 repair range that covers most Macomb County work, and larger or more involved repairs, like extensive flashing rebuilds, can run higher. If the roof itself is old enough or damaged enough that the leaks are widespread rather than a single traceable detail, that conversation shifts toward the $18,000 to $30,000 metal replacement range, and an honest inspection is what tells you which side of that line you are actually on.
If water is coming in right now, our 24/7 emergency tarping stops the interior damage while the permanent fix gets scheduled. Otherwise, start with a free inspection, or get a ballpark first with the instant estimator, the full ranges on our pricing page, or the cost calculator. Our metal roof maintenance checklist covers the periodic upkeep that catches most of these failures before they leak, and our metal roof condensation guide is the companion piece for water that shows up on clear cold mornings rather than during rain, since that is usually condensation rather than any of the leak sources on this page.
- Metal panel leaks almost always trace to a penetration, a sealant or gasket, a flashing transition, or winter ice backup, not the flat panel itself.
- Pipe boots and other roof penetrations are the single most common leak source because the rubber boot ages faster than the metal around it.
- A hardened, cracked fastener gasket or side-lap sealant needs replacing, not just retightening or recaulking.
- Chimney and side-wall flashing failures can show a stain several feet from the actual entry point, which is why tracing the water trail matters more than guessing from the ceiling stain.
- Winter ice backup at the eaves is seasonal, not a defect, and the real fix is usually attic ventilation and ice barrier, not a heavier sealant.
- Most metal roof leak repairs run $350 to $3,200, and a free inspection is the fastest way to know which of the four sources you actually have.
Questions we hear most
Because the panel field is rarely where the leak starts. The far more common sources are a cracked pipe boot at a penetration, a hardened fastener gasket or aged side-lap sealant, a flashing transition at a chimney or wall, or winter ice backup working under the panels at the eave. A free inspection checks each of these in order rather than guessing from the interior stain.
It can buy a little time, but caulk smeared over a symptom rarely fixes the actual failed detail underneath, and it can trap moisture in a way that makes the real repair harder later. Finding the true entry point, a boot, a gasket, a flashing detail, or an ice-related eave issue, and fixing that specific thing is what makes a repair hold.
Yes. For an active leak we offer 24/7 emergency tarping to stop water from causing further interior damage, then schedule the permanent repair once the true source is diagnosed, often the same week. Call (586) 300-1746 to get on the schedule.
- FEMA, disaster declaration DR-4757-MI, Michigan severe storms of August 2023 (Macomb County designated). fema.gov/disaster/4757
- U.S. Department of Energy, Energy Saver program, guidance on attic ventilation and ice dam prevention. energy.gov/energysaver/air-sealing-your-home
- Metal Construction Association, technical resources for metal roof systems. metalconstruction.org
- InterNACHI Standards of Practice for home inspections (scope of a generalist roof inspection). nachi.org/sop