
JUMP TO A SECTION
An adjuster who has never met you will spend a few minutes on your roof and then decide, largely from photographs and their own notes, what the storm did and what it will cost to fix. That is the whole game: your phone is building the file that either matches what they saw or leaves gaps they fill in against you. Most homeowners photograph damage the way they photograph a vacation, a handful of shots of whatever looked bad from the driveway. Evidence-quality documentation is a repeatable pattern instead, the same four shots at every damaged spot, taken from solid ground. This guide is that pattern, plus the safety rule that matters more than any single photo: you should not be on the roof to take it.
01 / THE SHORT ANSWERThe pattern: wide, mid, close with scale, repeat
For every area of damage, adjusters and experienced claim handlers work from the same layered view. A wide shot shows the whole slope or elevation so the damage has context, a landmark like a chimney or a valley to anchor it. A mid-range shot closes the distance to the damaged zone itself. A close-up with a scale reference, a tape measure, a coin, or a business card laid flat near the damage, shows size and detail an adjuster cannot get from ten feet away. Shoot all three from a consistent angle and you have a set that reads as one coherent story instead of a scattered pile.
At every damaged spot: one wide shot for context, one mid-range shot for location, one close shot with something for scale next to the damage, all taken from the ground or a safe vantage point, never from the roof itself.
You do not need a professional camera. A modern phone camera is more than sharp enough, and its automatic timestamp and location tagging are doing useful work you would otherwise have to do by hand. What actually separates a useful photo set from a weak one is the pattern, the consistency, and where you stood to take it, not the equipment.
02 / SAFETYWhy you should stay off the roof to get these photos
The instinct after a storm is to get up there and look, and that instinct is exactly backwards. A roof that has just taken wind or hail damage is the least stable it will be all year: loosened shingles, weakened decking, and debris are all reasons a homeowner without fall protection or roofing experience should not be walking it, especially while distracted trying to line up a shot. The photos that matter most can all be taken with both feet on the ground.
- From the ground, at a distance. Back up until you can see the whole slope, then use your phone's zoom rather than walking closer to a ladder edge. Most roof damage is visible this way, especially missing shingles, lifted tabs, and denting on gutters and downspouts.
- From an upstairs window or a stable second-story vantage point. A window that faces the damaged slope often gets you a mid-range shot without a ladder at all.
- From the top of a securely footed ladder against the gutter line, feet on the ladder only. This is as far as a homeowner should go, and only if the ladder is on firm, level ground with someone spotting it.
- With a pole camera, extendable monopod, or a drone if you already own one. Any tool that gets the lens closer without getting you closer works.
If none of those get you a clear shot of a specific spot, that gap is fine to leave. A professional inspection closes it safely, and it is exactly what our free inspection is for: our team gets on the roof so you never have to, and the photos we take become part of your file.
03 / THE SHOT LISTWorking the roof systematically, slope by slope
Treat the roof as a set of elevations, front, back, and each side, and work through them in order rather than chasing whatever looks worst first. For each elevation, start wide.
The wide shot
Stand far enough back to fit the entire slope in frame, including a fixed landmark, the chimney, a dormer, a valley line, so the adjuster can locate the damage on the roof later without guessing which photo goes where. Take one wide shot per elevation even if you see no damage on it; a roof with nothing wrong on the north slope is itself useful information.
The mid-range shot
Zoom or move closer until the damaged area fills most of the frame, keeping enough surrounding roof visible to show where it sits relative to the landmark in the wide shot. This is the bridge between context and detail, and it is the shot most homeowners skip, jumping straight from a driveway photo to an extreme close-up that could be from any roof in the county.
The close-up with scale
Lay something flat next to the damage, a tape measure extended a few inches, a coin, a business card, and photograph straight down or at a consistent angle rather than at a sharp tilt that distorts size. Creased shingles, hail bruising, and granule loss all read very differently at true scale than in a photo with nothing to compare them to. If you cannot safely get this close from the ground, this is one of the shots worth leaving to a professional inspection rather than risking a fall for.
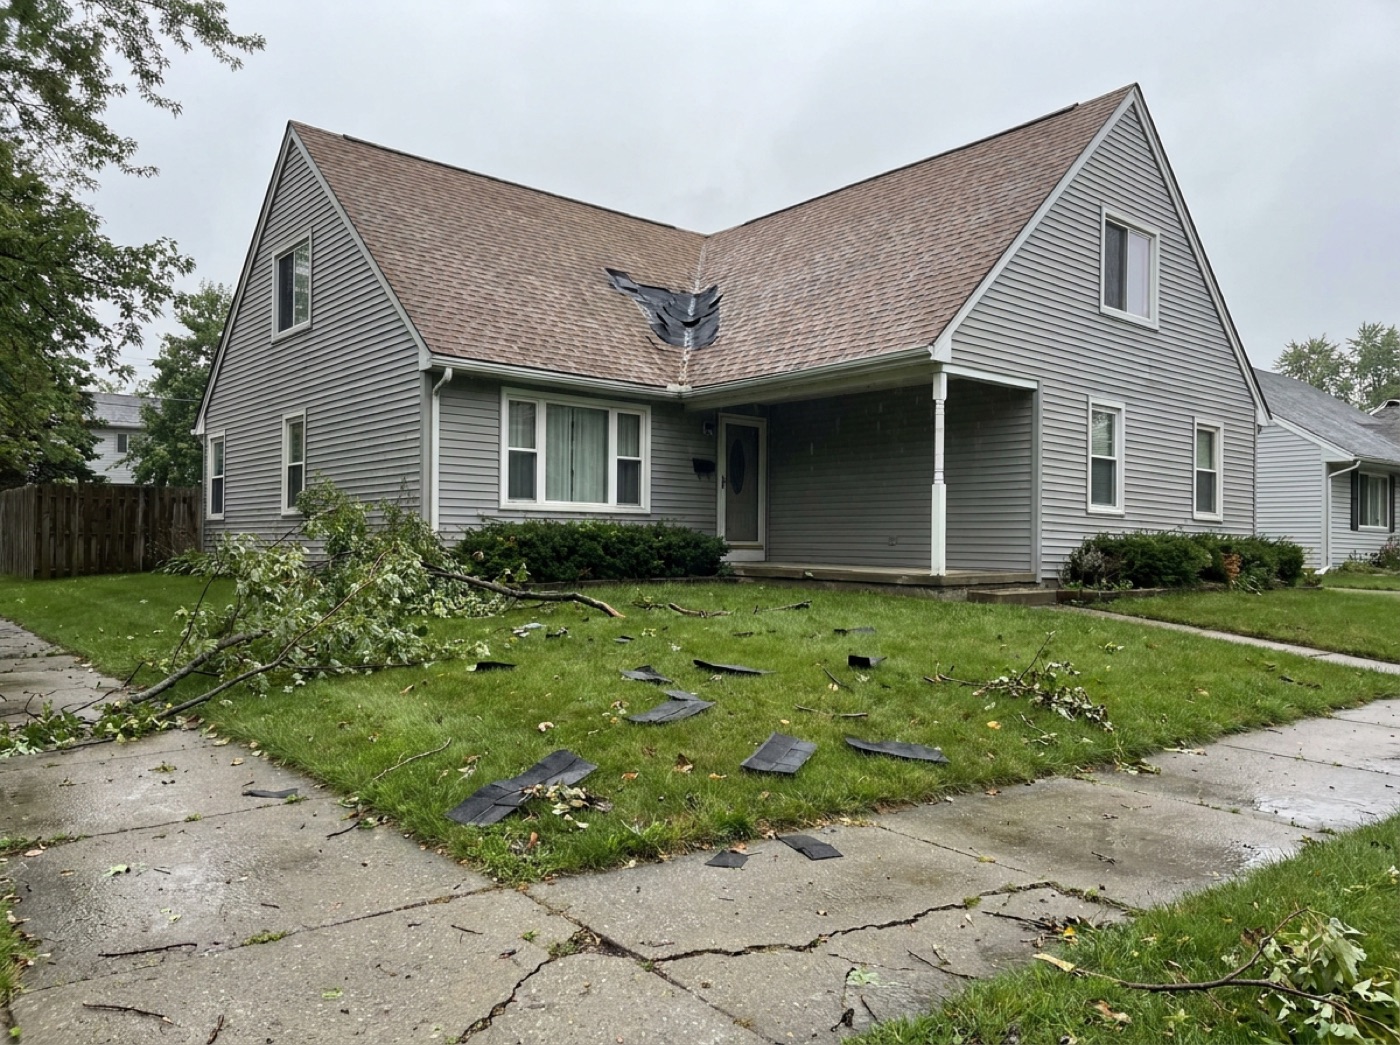
Repeat the wide, mid, close pattern for gutters, downspouts, siding, window screens, and any vent or exhaust cap, since hail and wind damage rarely stop at the shingles. Shoot each area in similar light, midday with the sun behind you rather than into the lens, so glare and harsh shadow do not hide detail an adjuster needs to see.
04 / THE METADATATimestamps, location data, and keeping the file intact
Before you take a single photo, confirm your phone's location services and date and time are on, since most phones embed this metadata automatically in every photo file. That embedded record is often more persuasive to an adjuster than anything written in a claim narrative, because it is generated by the device rather than by the homeowner. Two habits protect it:
Screenshotting a photo, texting it through certain apps, or running it through a filter can strip the embedded timestamp and location data, so send or share the original file whenever possible. A simple folder structure by date and elevation, front, back, left, right, is enough to keep a growing photo set usable months into a claim. Our storm damage documentation checklist covers the full file structure, correspondence log, and receipt tracking that photos are only one part of.
05 / INSIDE THE HOUSEPhotographing interior damage: ceilings, walls, and the attic
Roof damage often shows up indoors before anyone climbs a ladder outside: a brown ring spreading on a ceiling, a bubbled patch of paint, a musty smell in a closet. The same wide, mid, close pattern applies here. Photograph the whole ceiling or wall for context, then move closer to the stain, then closer still with a scale reference if the area is spreading or active.
If your attic is safely accessible on stable flooring, photograph the underside of the roof deck where light or water is visible, since that view often shows exactly where a leak is entering, sometimes feet away from where it appears on the ceiling below. If a ceiling is bulging with trapped water, do not stand directly under it and do not push on it to test it; photograph from a safe distance and call for help relieving it rather than risking a collapse onto you.
If water is actively coming through the ceiling or you are unsure whether a bulge is about to give way, documentation can wait. Get people and belongings clear first, then photograph once it is safe. Our 24/7 emergency tarping line exists for exactly this moment, and stopping the water is always the higher priority than the perfect photo.
06 / THE MISTAKESCommon photo mistakes that weaken a claim
A few habits show up again and again in photo sets that give an adjuster less to work with than the homeowner thinks they have provided.
| MISTAKE | WHY IT HURTS | THE FIX |
|---|---|---|
| Only close-up shots, no wide context | Adjuster cannot locate the damage on the roof | Shoot wide, then mid, then close every time |
| No scale reference in close-ups | Size and severity are guesswork from a photo alone | Lay a coin, card, or tape measure in frame |
| Screenshots instead of original files | Timestamp and location metadata can be stripped | Send or share the original photo file |
| One photo per damaged area | A single angle misses hail bruising visible from other light | Take several angles of the same spot in similar light |
| Filtered or edited images | Edited photos read as less credible evidence | Keep an unedited original of every shot, always |
None of these mistakes are fatal on their own, and an experienced adjuster has seen worse. But a clean, consistent photo set is one less thing standing between the damage on your roof and the number on the claim, and it costs nothing but a slightly slower walk around the house.
07 / WHERE WE FIT INWhat a professional inspection adds to your own photos
Your own ground-based photos are valuable the moment the storm passes, before anyone else has looked at the roof. What they cannot fully replace is a close inspection of the roof surface itself, the flashing, the vents, and the attic side of the deck, taken by someone trained to know what a covered loss actually looks like up close. That is what our free inspection adds: we get on the roof so you do not have to, photograph what we find in the same wide, mid, close pattern, and can meet your adjuster on site to walk the damage together.
What we will not do is tell you what your claim is worth before an adjuster has seen it, or promise a claim outcome; no honest contractor can. What we can tell you, from the photos alone, is whether you are more likely looking at a repair or a full replacement, and either way the canon on cost holds: repairs in Macomb County run $350 to $3,200, and full asphalt replacements run $9,000 to $18,000, with most homes landing $12,000 to $16,000. You can rough out either number in about a minute with the cost calculator, or see the full breakdown on our pricing page.
If the damage traces back to a specific storm date, our guides library also covers how to anchor a late-discovered claim to public weather records, and once the adjuster has scheduled a visit, our guide to requesting a reinspection is worth reading before that appointment, not after, in case the first look misses something your photos already show.
- Every damaged spot gets three shots: wide for context, mid-range for location, close with a scale reference for detail.
- Stay off the roof. Ground level, an upstairs window, or the top of a securely footed ladder is as far as a homeowner should go.
- Keep original photo files with timestamp and location metadata intact; screenshots and filtered images can strip that record.
- Interior damage gets the same wide, mid, close treatment, and active leaks or bulging ceilings mean safety first, photos second.
- A free inspection adds the close, on-roof detail your own ground photos cannot safely capture, and we can meet your adjuster.
Questions we hear most
Work through each roof elevation with the same three shots: a wide shot showing the whole slope and a landmark for context, a mid-range shot of the damaged area, and a close-up with something for scale, a coin or tape measure, laid next to the damage. Take every shot from the ground, an upstairs window, or a securely footed ladder, never from the roof itself.
No. A storm-damaged roof is at its least stable right after the event, with loosened shingles and possible deck damage that is not visible from above. Ground-based photos, zoomed in with your phone, cover most of what an adjuster needs, and the close, on-roof detail is better left to a professional inspection.
It helps a great deal. Most phones automatically embed the date, time, and often location into each photo file, which can be more persuasive than a written account alone. Keep your phone's location services on before you start shooting, and share the original photo files rather than screenshots, which can strip that embedded metadata.
- FEMA, disaster declaration DR-4757-MI, Michigan severe storms of August 2023 (Macomb County designated). fema.gov/disaster/4757
- Michigan Department of Insurance and Financial Services (DIFS), consumer insurance resources and complaint process. michigan.gov/difs
- Haag, engineering-based damage assessment methodology for hail and wind effects on roofing. haagglobal.com