
JUMP TO A SECTION
Nobody plans to learn the claims process. You learn it the week you need it, usually with a wet ceiling overhead and a stack of unfamiliar paperwork on the kitchen table. This guide exists so that week goes better. It walks a Michigan roof insurance claim in the order it actually unfolds: what to do in the first hours after damage is suspected, how the claim gets reported, what the adjuster visit is for, how the money arrives and why it usually arrives in two pieces, and what has to happen after the roof is built before the file closes. It is written for a stressed homeowner to follow step by step, and it is honest about the limits: policies differ, carriers differ, and nothing here is legal or insurance advice. Claims may be approved, adjusted, or denied on facts we cannot see from a webpage, and no contractor can promise a claim outcome. What we can promise is that the process below is the process, and that a homeowner who follows it is arguing from evidence at every stage instead of from memory. The wider playbook for every storm scenario lives on our storm and insurance claims page; this page is the master how-to for the claim itself.
01 / FIRST HOURSBefore you call anyone: document, then mitigate
The two most valuable things you will ever do for a roof claim happen before the insurance company knows your name. The first is documentation. The second is temporary mitigation. Do them in that order.
Step 1: photograph everything, dated, from safe ground
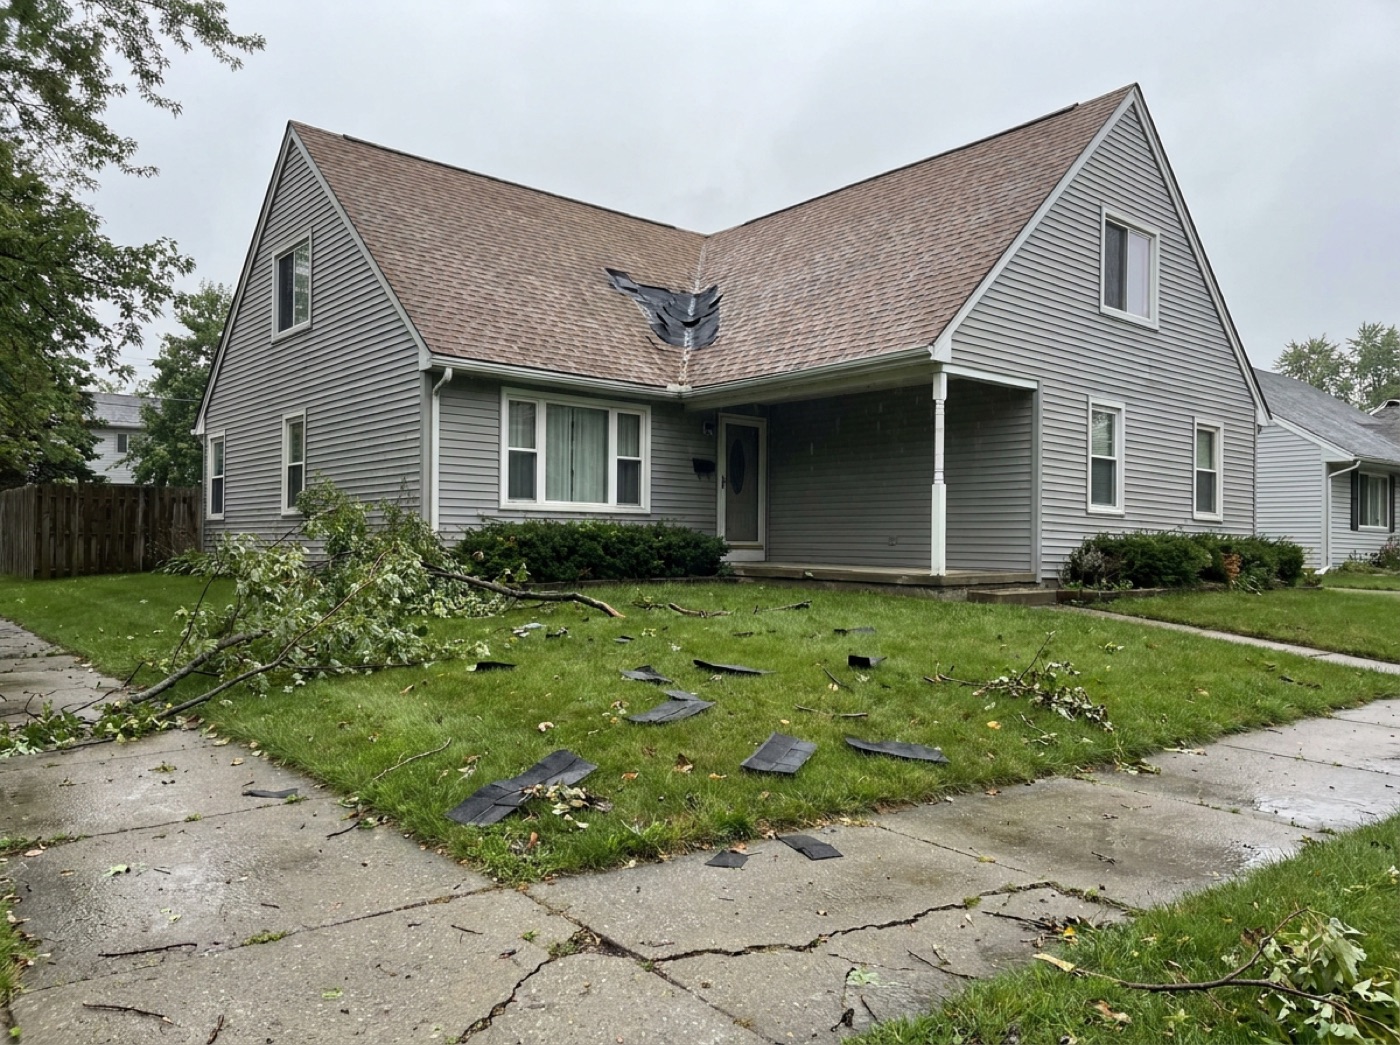
Before anything is moved, covered, or cleaned up, build the photo record. Shoot the roof from each side of the house at a safe distance, close enough that lifted or missing shingles read in the frame. Photograph debris where it fell, shingles in the yard, dented gutters and vents, and any interior staining on ceilings or walls. Date matters as much as content: a claim often turns on tying damage to a specific storm, and a photo timestamped the day after the event is worth far more than the same photo taken in three weeks. Do not get on the roof for this; ground-level and window-level photos are enough to start, and a professional can capture the rest safely. Our storm damage documentation checklist is the complete shot list, and it is worth opening on your phone while you walk the property.
Step 2: stop the bleeding, temporarily
Nearly every homeowner policy carries a duty to mitigate, which means taking reasonable temporary steps to keep a covered loss from getting worse. In practice that means a properly installed tarp over the breach, buckets and plastic under active drips, and moving furniture and valuables out of the wet zone. Keep every receipt, because reasonable mitigation costs are often reimbursable as part of the claim. What mitigation does not mean is permanent repair: rebuilding the roof before an adjuster has seen it can remove the very evidence the claim depends on. Tarp it, document it, and leave the permanent work for after the inspection. This is exactly why our emergency line runs 24/7 for tarping, and tarping only; the permanent repair gets scheduled in daylight, after the file is protected. If the damage is active and spreading, start with our storm damage service and treat this guide as what happens next.
Step 3: find the policy before you dial
Ten minutes with your declarations page changes the quality of every conversation that follows. Find your deductible, and check whether wind or hail losses carry a separate, often larger deductible than the standard one. Note whether the roof is covered at replacement cost or actual cash value, because that single line controls how the money flows later. If the numbers are unfamiliar, that is normal; the point is to walk into the first phone call knowing what you agreed to, not to discover it at payout time.
Regional storms bring door-knockers, and some of them are excellent salespeople. Be careful with anyone who wants a signature on the first visit, offers to handle the insurance company for you before an adjuster has seen the roof, or promises the claim will pay. Take photos, call your own insurer, and choose your contractor the way you would without a storm: locally, deliberately, and in writing.
02 / THE CALLReporting the claim and opening the file
With the roof tarped and the photos taken, report the loss to your carrier. Most insurers take first notice of loss by phone, through their app, or online, and the channel matters less than the promptness. Policies commonly require notice given promptly or as soon as practicable, and while those phrases are not precise, waiting weeks gives a carrier room to argue the delay made the damage worse or harder to verify. Michigan consumer guidance from the Department of Insurance and Financial Services covers what to expect when filing; we cite it below rather than paraphrasing it from memory.
Have a short, factual account ready: the date of the storm, what you observed and when, what temporary steps you took, and whether the house has interior damage. Stick to what you know. Guessing at the roof's age, speculating about old leaks, or volunteering theories about cause can complicate a file in ways that are hard to walk back. When the call ends you should have three things written down: the claim number, the name and direct contact of the person handling the file, and what the carrier says happens next. Start a simple log that day, one line per contact, with the date and what was said. It takes thirty seconds per call and it is the difference between a file you can reconstruct and one you cannot.
One Macomb County note belongs here. After the severe storms of August 2023, the county was included in federal disaster declaration DR-4757, and claims from that event are a live example of how a dated regional storm anchors a file: the event is on the public record, so the argument shifts from whether a storm happened to what it did to your roof. Damage from a storm like that can also surface months later, through a winter leak or a sale inspection, and late-discovered damage may still be claimable inside your policy's deadlines. The hard timing rules get their own treatment in section 06 and in our guide to the Michigan roof claim filing deadline.
03 / THE INSPECTIONThe adjuster visit: what it is and how to be ready
After the claim is opened, the carrier assigns an adjuster who schedules an inspection. This visit is the center of gravity of the entire claim: the adjuster's notes, photos, and measurements become the carrier's version of what happened to your roof, and everything downstream, from the coverage decision to the estimate, is built on them. Treat the appointment accordingly.
Preparation is mostly assembly. Have your photo set, your mitigation receipts, your contact log, and a short written list of every damage location you know about, inside and out. Walk the adjuster to each item on the list rather than assuming it will be found; adjusters are human, schedules after regional storms are brutal, and an unmentioned bedroom ceiling stain is an unpaid bedroom ceiling stain. You are allowed to be present, and you are allowed to have your contractor present. We can meet your adjuster on site, walk the roof with them, and point to what we documented, though the coverage decision is always the carrier's to make and we never pretend otherwise. What a second set of trained eyes does is make sure the roof gets read completely: every slope walked, soft metals checked, the attic side considered.
The visit itself typically covers the roof surface slope by slope, the flashings and penetrations, gutters and vents, siding and screens, and any interior damage you report. What the adjuster is doing up there, how long it takes, and what happens in the days after are covered start to finish in our companion guide to the insurance adjuster roof inspection, which is worth reading the night before yours. If you disagree with the findings later, most carriers have re-inspection paths, and a documented file is what makes that request credible.
The adjuster visit is the one hour of the claim you cannot redo. Prepare for it like it matters, because everything after it is paperwork built on that hour.
04 / THE MONEYThe estimate, the deductible, and why checks come in twos
If the adjuster concludes the damage is covered, the carrier produces an estimate: a line-item scope of what it will pay to repair or replace, priced against its own cost data. Read it slowly, all of it. Check that every damage location you reported appears, that the roof measurements roughly match reality, and that code-required items and tear-off are in the scope. Estimates can be revised; carriers generally have a supplement process for legitimate items the first scope missed, and a contractor who works claims regularly will know how to submit one. An estimate is the opening of a documented conversation, not a verdict.
Now the arithmetic. Your deductible comes off the top of any payout, so the first honest question is whether the covered scope clears it by enough to be worth the claim history. For scale, roof repairs in Macomb County run $350 to $3,200, while a full asphalt replacement runs $9,000 to $18,000, with most homes landing $12,000 to $16,000. A claim that nets a few hundred dollars after the deductible may not be worth its effect on future renewals; a claim funding a five-figure replacement usually is. Our published ranges are on the honest pricing page, and the 60-second cost calculator turns them into a ballpark for your own roof, which is exactly the number you want in hand when you read a carrier's estimate.
Then there is the shape of the payment. On a replacement cost policy, most carriers pay in two stages. The first check is the actual cash value of the roof, meaning the estimate minus your deductible and minus depreciation for the roof's age. The second check, the recoverable depreciation, is held back until you prove the work was actually completed, usually with a final invoice and sometimes photos or a completion certificate. On an actual cash value policy there is no second check at all: the depreciated payment is the whole payment, which on an older roof can sit far below the cost of the replacement. One more wrinkle: if you have a mortgage, the check is often made out to you and your lender together, and the lender will have its own endorsement and disbursement process. Call your mortgage servicer early, because their paperwork runs on its own clock.
is what a full asphalt replacement runs in Macomb County, with most homes landing $12,000 to $16,000. That is the scale of a total-loss roof claim, and it is why carriers scrutinize these files. Get your own ballpark from the instant estimator before you read anyone's estimate, theirs or ours.
05 / THE FINISHCompletion paperwork and getting the depreciation released
With the scope agreed and the first check in hand, the claim leaves the insurance office and becomes a construction project. Choose your contractor the way you would without insurance involved: local, licensed and insured, with a written contract that matches the approved scope. The permit, the installation, and the inspection happen the way any roof does, and a contractor who documents their work is quietly building the last exhibit your claim needs.
Because the file is not done when the shingles are on. If your policy pays replacement cost, the depreciation the carrier held back is released only when completion is proven, and that proof is on you and your contractor to send: typically the final invoice showing the work completed at the agreed scope, sometimes photos, a certificate of completion, or a permit sign-off. This is the single most commonly abandoned step in the entire process. Homeowners cash the first check, build the roof, and never send the completion package, leaving four figures of their own money sitting in a carrier's ledger. Send it promptly, keep a copy, and log the date. The mechanics, including what to do when a release stalls, are in our guide to recovering depreciation on a roof claim.
If the numbers moved during construction, and they sometimes do when decking or code items surface at tear-off, the supplement process from section 04 handles the difference: documented items, submitted with photos, before the file closes. What you should not do is quietly absorb legitimate covered costs because the claim already felt long. The file is open until the last check clears; use it.
06 / THE CLOCKMichigan timing: your deadlines and theirs
Two clocks run on every Michigan roof claim, and they run in opposite directions. The first is yours. Beyond the prompt-notice duty at the start, Michigan homeowner policies commonly carry a hard limitation period, often one year, on bringing suit over a claim, a structure tied to Michigan's statutory fire policy provisions. The exact period, and how it is tolled while a carrier considers a claim, is the kind of specific we state only with the statute in front of us, so it appears in the sources below rather than as a confident sentence here. The practical rule needs no statute: report promptly, respond promptly, and do not let a disputed claim drift past its first anniversary without professional advice. The full timing picture, including what late discovery does to a file, is in the filing deadline guide.
The second clock is the carrier's. Michigan's insurance trade-practices rules set expectations for timely claim handling and payment, and interest can accrue on claims paid late; again, the day counts belong to the sourced statutes, not to a roofing site's paraphrase. What a homeowner controls is friction: complete documentation, prompt responses, and a dated log make it easy for a diligent adjuster to keep the file moving and easy to show when a file has genuinely stalled. Be patient after major regional events, when catastrophe teams deploy and inspection queues stretch, but patient is not the same as passive. A polite written status request, referencing your claim number and the dates in your log, is appropriate any time the file goes quiet, and persistent silence has escalation paths through DIFS that the deadline guide covers.
07 / OUR ROLEWhere a roofer honestly fits in a claim
A claim has exactly two decision-makers: you and your carrier. A roofing contractor is neither, and you should be suspicious of any who acts otherwise. What an honest contractor contributes is evidence and execution, and both matter more than they sound. On the evidence side, our inspection is $0 with no obligation: we photograph the roof slope by slope, check the attic side, and put what we find in writing, which gives you an independent record to set beside the adjuster's and a real answer to whether the damage is even worth a claim. If it is a $400 repair on a healthy roof, we will tell you that, because a claim below your deductible helps no one. On the execution side, we can meet your adjuster on site, submit supplements with documentation when the scope misses something, build the roof to the agreed scope, and produce the completion paperwork that gets your depreciation released.
The order of operations we recommend is simple. Document first. Mitigate with a tarp, not a rebuild. Get an independent inspection before or immediately after you report the claim, so you know what the roof actually needs. Be present for the adjuster visit with your file assembled. Read the estimate against published numbers, and supplement what is missing. Then build the roof once, correctly, and close the file with the completion package. Every step is described in more depth across our guides library, and the inspection that starts it takes about a minute to request through the instant estimator.
- Document first, mitigate second: dated photos of every slope and stain, then a tarp and receipts, and no permanent repairs before the adjuster inspection.
- Report the loss promptly, write down the claim number and handler, and keep a one-line-per-call log for the life of the file.
- The adjuster visit is the hinge of the claim: assemble your file, list every damage location, and have your contractor there; we can meet your adjuster on site.
- Replacement cost policies usually pay in two checks, actual cash value first and held depreciation after proof of completion, with your deductible off the top and your lender often on the check.
- Two clocks run: report and respond promptly on yours, and use documentation, written status requests, and the sourced Michigan timing rules to keep the carrier honest on theirs.
- A roofer contributes evidence and execution, never the decision: a $0 documented inspection tells you whether the claim is worth filing at all.
A last word on expectations. Most documented, promptly reported storm claims move through this sequence without drama. Some do not, and the guides linked from this page cover the disputes, the delays, and the denials in detail. Either way, the homeowner who follows the sequence above walks into every stage holding the file, and in an insurance claim, the file is the leverage. If your roof took a hit and you want to know where you stand before you decide anything, that is what a free inspection is for.
Questions we hear most
Document, then mitigate. Take dated photos of the roof from safe ground, the debris, and any interior stains before anything is moved, then stop further damage with temporary measures like a properly installed tarp and keep the receipts. Do not make permanent repairs before the adjuster inspection, because they can remove the evidence the claim depends on. With the roof protected, report the loss to your carrier promptly and write down the claim number.
On a replacement cost policy, payment usually arrives in two stages: a first check for the actual cash value of the roof, which is the estimate minus your deductible and depreciation, then the held-back depreciation after you send proof the work was completed. On an actual cash value policy the depreciated payment is the entire payout. If you have a mortgage, the lender is often named on the check and has its own disbursement process, so contact your servicer early.
You are not required to, but an independent inspection changes the quality of the file. A documented roofer's report gives you a second read to set beside the adjuster's, we can meet your adjuster on site to make sure every slope is examined, and after approval the contractor's invoice and completion paperwork are what release the held depreciation. The coverage decision always belongs to the carrier, and no contractor can promise a claim outcome. Our inspection is free with no obligation either way.
- FEMA, disaster declaration DR-4757-MI, Michigan severe storms of August 2023 (Macomb County designated). fema.gov/disaster/4757
- Michigan Department of Insurance and Financial Services (DIFS), consumer insurance resources and complaint process. michigan.gov/difs
- Insurance Information Institute, consumer explainers on homeowners policy coverage, deductibles, and the claims process. iii.org