
JUMP TO A SECTION
Every homeowner starts the same way: staring straight up at a brown ring on the ceiling, assuming the hole in the roof is directly above it. It almost never is. Water takes the path of least resistance once it gets past the shingles, and that path runs sideways along the underside of the roof deck, down the slope of a rafter, across a truss chord, before it finally soaks through drywall and shows itself. Chasing the stain straight up is the single most common mistake homeowners make, and it sends a lot of people onto their roof looking in the wrong spot entirely. This guide walks the method in order: how to think about where water actually enters, the usual suspects ranked by how often they are the real culprit, how to read the trail once you are in the attic, and the controlled hose test a professional uses to reproduce a leak that will not show itself on command. If you get partway through and cannot pin it down, that is exactly what a free roof inspection is for.
01 / THE SHORT ANSWERWork backward from the stain, not straight up
The rule that matters more than any other: the entry point is almost always uphill of the stain, and often to one side of it. Water follows gravity along whatever surface it lands on first, whether that is the top of the insulation, the underside of the decking, or a rafter edge, and it will travel a surprising distance before it finds a gap in the drywall or a seam in the ceiling to drip through. A stain in the middle of a bedroom ceiling might trace back to a chimney twelve feet away, or a vent boot on the opposite slope of the roof. Before you climb anywhere, stand under the stain and look up, then trace every rafter and truss member you can see back toward the roofline, because that framing member is your map.
Water enters uphill of where it shows. Every step below is really just a more organized way of applying that one idea, from the ground, in the attic, and on the roof.
02 / THE DRIVERSThe usual suspects, in the order they actually fail
Roofers do not check everything at once. Experience says most leaks come from a short list of components, and checking them in order of likelihood finds the answer faster than a random walk across the roof. Part of why this order works is visibility: some failures announce themselves from the driveway, and others hide until someone is standing on the roof or in the attic looking for them. The table below is a quick reference before the detail on each suspect.
| SUSPECT | HOW LIKELY | VISIBLE FROM THE GROUND? |
|---|---|---|
| Pipe boots and vent penetrations | Most likely | Often, with binoculars |
| Flashing (valleys, chimneys, walls) | Very likely | Rarely, needs a closer look |
| Valleys specifically | Likely | Sometimes, if debris is visible |
| Field shingles | Least likely | Yes, but easy to over-blame |
Notice the pattern: the components that are hardest to see from the ground are also among the most likely culprits, which is exactly why a homeowner's first instinct, staring at the shingle field because it is the part of the roof you can actually see, so often points the wrong way.
1. Roof penetrations: pipe boots, vents, and stacks
Anything that pokes a hole through the shingles is the first place to look, because it is the first place a roof actually fails. The rubber boot sealing a plumbing vent pipe dries out and splits from years of sun and freeze-thaw cycling, usually well before the shingles around it show any wear. The same goes for the collars around exhaust vents and bath fan caps. From the ground, look for a cracked or curled rubber collar, or a rusted metal one, anywhere a pipe or vent pokes through the roof plane. This is also the cheapest fix on the list, which is a small silver lining if it turns out to be your answer.
2. Flashing: valleys, chimneys, and sidewalls
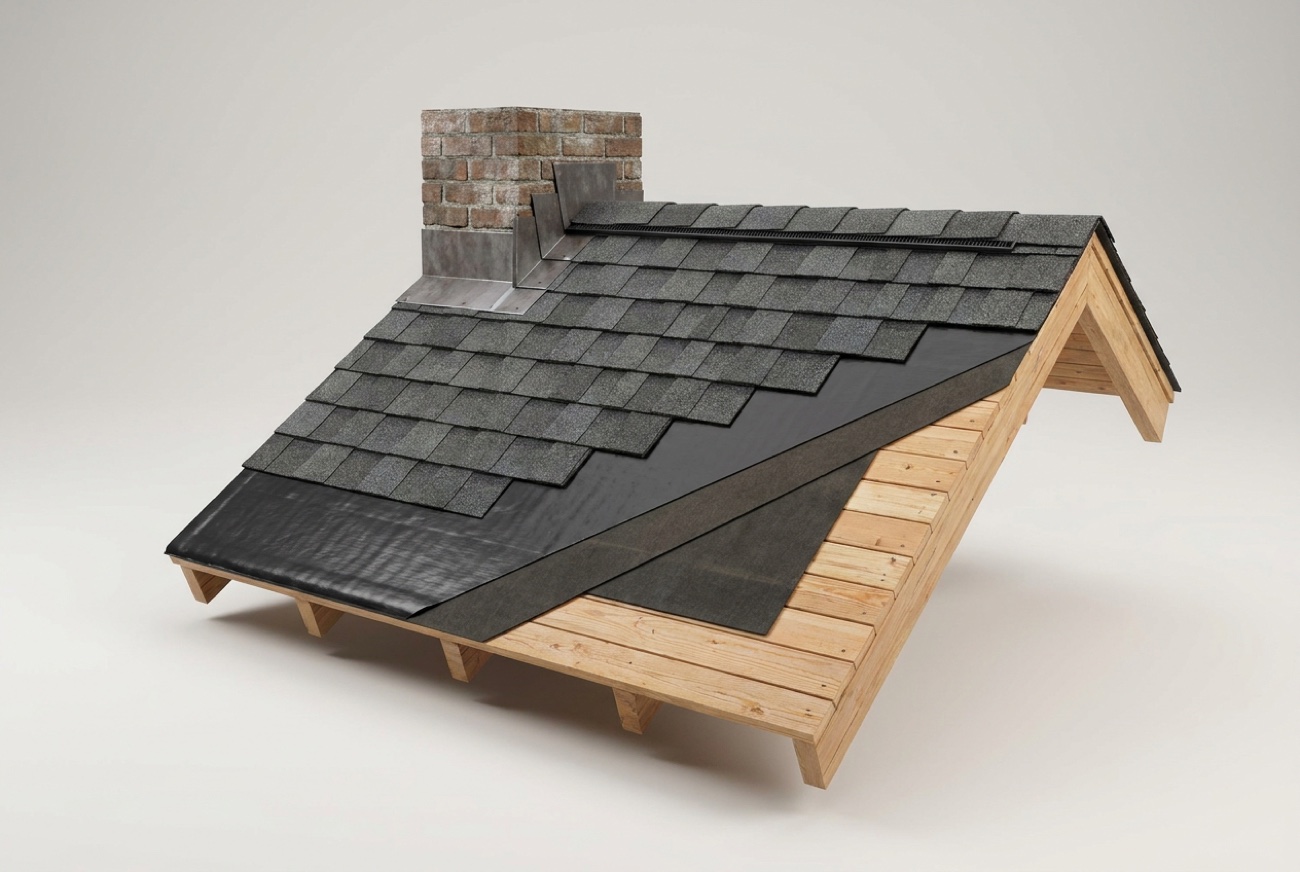
Flashing is the metal that seals every place the roof plane meets something that is not more roof: a chimney, a sidewall, a skylight curb, or the V where two slopes meet in a valley. It fails differently than shingles do. Step flashing lifts as sealant dries out. Valley metal corrodes or gets walked on and dented until water jumps the seam. Counterflashing at a chimney pulls out of its mortar joint as the house settles. None of that shows up as missing shingles from the ground, which is why flashing gets missed on a quick look and is responsible for a large share of the leaks that get called mysterious.
3. Valleys specifically, and dead valleys
Valleys deserve their own line because they carry more water than any other part of the roof, funneling runoff from two slopes into one channel. Debris, ice, and granule buildup collect there and hold water against the metal or the shingle laminate longer than anywhere else on the roof. A valley that looks fine in July can be the exact spot backing water under the shingles every time a Michigan freeze-thaw cycle runs, so a valley with any visible debris, rust streaking, or curling shingle edges belongs high on the suspect list.
4. Field shingles, checked last, not first
The shingles themselves, the plain field of the roof away from any penetration or flashing detail, are the least common source of a leak, and also the most obvious place homeowners look first because it is the whole roof, not one small part. Wind can lift a tab and break the seal strip, hail can bruise or crack the mat, and age eventually leaves shingles brittle enough to crack when a squirrel or a ladder touches them. But checking the field before you have ruled out the penetrations and flashing is backward. If you already suspect wind damage specifically, our guide on signs your roof needs repair walks through what to look for on the shingles themselves.
03 / THE INTERIOR EVIDENCEReading the water trail once you're inside
Before you touch the roof at all, the attic and the stain itself already hold most of the clues. A dry, tan-edged stain that has not grown in weeks tells a different story than a dark, soft, actively wet patch after every rain. Note whether the stain grows only during or right after rain, or seems to linger regardless of weather, because that distinction points toward a true roof leak versus a condensation or plumbing issue. Our roof leak or condensation guide and our attic tracing guide both go deeper on that interior half of the search, including how to walk the joists safely and read rafter staining once you are up there.
One detail worth logging even if you cannot climb into the attic yourself: does the leak only show up during heavy or wind-driven rain, or does it drip during ordinary showers too? A leak that only appears in hard, blowing rain often points to a marginal flashing lap or an unsealed shingle edge that only lets water through once wind forces it sideways, and that pattern is different enough from a constant leak that it gets its own guide. If that sounds like your situation, roof leaks in heavy rain covers the specific causes and how a pro reproduces them.
If you can safely access the attic, a flashlight and a slow walk along the joists (never step between them onto the drywall) will usually show you more than the ceiling stain ever could. Look for:
- Dark or discolored streaking on the underside of the decking or along a rafter, which marks the actual path the water traveled
- Rust-colored bleed at the tip of roofing nails poking through the deck, a sign moisture has been sitting against that spot for a while
- Matted, compressed, or stained insulation directly beneath a streak, which often sits downhill of the true entry point
- Any daylight visible around a pipe, vent, or chimney chase where flashing or a boot should be sealing it completely
Mark whatever you find with painter's tape or a grease pencil and measure the distance from a fixed point, like a truss number or the chimney chase, so the finding can be handed off precisely if a roofer takes over from there. Our full attic-side walkthrough in tracing a roof leak in the attic covers the safety prep and the reading of these signs in more depth than fits here.
04 / THE RECREATEThe controlled hose test pros use
Some leaks refuse to cooperate. They showed up once during a specific storm and have not repeated since, or they are so slow that waiting for the next rain to confirm a fix could take weeks. When a leak will not reproduce on its own schedule, roofers force the issue with a garden hose and a second person, working the roof in small, controlled sections rather than spraying the whole thing at once.
What the test takes
- A second person, since one watching inside and one running water outside is the whole method; a solo hose test proves nothing
- A garden hose with enough reach to cover the suspected zone from a stable position, ideally without standing directly on wet shingles
- A phone or radio between the two people, so the person inside can call out the exact moment water appears
- Good light in the attic or at the stain, and a dry day with no wind, so nothing but the hose is adding water to the picture
How the test works
One person stays inside at the stain, or in the attic with a flashlight, watching for the first sign of water. The other works the roof from the bottom edge upward, running a steady, low-volume stream of water over one small zone at a time, starting well downhill of the suspected area. Each zone gets soaked for a stretch of several minutes before the person outside moves to the next section uphill, because water needs time to travel along the deck and show itself inside. If a drip appears while a particular zone is running and stops when the water moves on, that zone is the source. If nothing shows after working all the way up past the suspected penetration or flashing detail, the search moves outward to the next-most-likely component on the list in section two.
Why order and patience matter
The reason this test works when a quick spray does not is discipline: soaking the whole roof at once tells you nothing, because water finds its way in from a dozen directions simultaneously and the interior watcher cannot tell which stream caused the drip. Working low to high, one component at a time, and giving each zone real time before moving on is what turns a stubborn, intermittent leak into a repeatable, three-foot-square answer. It is also, frankly, tedious, which is the honest reason most homeowners call a professional for this step rather than spending a Saturday on a ladder.
A hose test only proves something if you can say which zone was running when the drip started. Soak the whole roof and you have just made your attic wet, not diagnosed anything.
05 / THE PRICEWhat finding and fixing the leak actually costs
Locating the leak is the hard part; fixing it, once you know the true entry point, is usually the fast and inexpensive half of the job. Roof leak repairs in Macomb County run $350 to $3,200, and larger or more complex repairs can run higher. A single failed pipe boot sits at the low end of that range. A rebuilt valley, extensive flashing replacement, or a repair that requires opening up a section of decking sits at the high end.
covers the great majority of roof leak repairs in Macomb County, from a single vent boot to a rebuilt valley or flashing run. Larger or complex repairs can run higher. For a deeper breakdown of what moves a repair up or down that range, see our roof leak repair cost guide.
The math that makes tracing worth the effort: a roofer who has to guess will often replace more than is necessary just to be safe, which costs you more than a targeted fix. A roofer who has a confirmed entry point, whether you found it yourself or a hose test pinned it down, can quote and repair exactly the failed component and stop there. That is also why we always inspect the attic side of the deck along with the roof surface before writing a repair price; it is the difference between a guess and a plan.
Doing the tracing yourself versus calling first
There is no wrong answer between working through the steps above yourself and simply calling for the free inspection up front. Homeowners who enjoy the detective work and have safe attic access often narrow a leak to one or two suspects before anyone else sets foot on the property, which speeds up the visit and can shorten the repair itself. Homeowners who would rather not be on a ladder, or whose attic is finished or hard to access, lose nothing by skipping straight to an inspection: the same order of suspects and the same hose test are simply run by someone who does this daily, and the repair price is the same either way.
06 / THE NEXT STEPWhen to stop searching and call a pro
There is no shame in stopping this process at any point. Homeowners without roofing experience should not be walking a wet, pitched roof, full stop, and the interior half of this search (attic access, insulation handling, electrical near recessed lights) has its own hazards. If you have traced the stain back to a general area but cannot pin an exact component, or the leak only shows during specific weather you cannot schedule around, that is precisely the gap a professional inspection closes.
Our free inspection covers the shingles, the flashing at every valley, chimney, and sidewall, the vent penetrations, and the attic side of the deck, with photos of whatever we find. If a hose test is needed to nail down a stubborn leak, that is part of the visit, not an extra charge. Start with the online estimator for a repair ballpark, browse the full roof repair service page for everything we cover, or check the cost calculator and the published pricing sheet against your own numbers before anyone sets foot on your roof.
- Water enters uphill of the stain, not directly above it; trace framing members back toward the roofline before you climb anything.
- Check suspects in order: penetrations and vent boots first, flashing at valleys and chimneys second, field shingles last.
- Read the interior evidence first (growing or stable, only in heavy rain or always) before you touch the roof.
- A controlled, zone-by-zone hose test with someone watching inside is how pros reproduce a leak that will not show itself on its own.
- Repairs typically run $350 to $3,200 once the true source is confirmed, and a free inspection is the fastest way to get there.
Questions we hear most
Water follows the roof deck and framing before it drips through drywall, so it often travels several feet sideways or downhill from the actual entry point before it shows. Always trace the visible framing member back uphill rather than assuming the entry point is straight above the stain.
A hose test is a controlled way to reproduce a stubborn or intermittent leak: one person runs water slowly over one small roof zone at a time while another watches inside for the first sign of water, working from the bottom of the roof upward. It is most useful when a leak has not shown itself during a normal rain, and it is something we include as part of a free inspection when needed.
Most roof leak repairs run $350 to $3,200 once the source is confirmed, and larger or complex repairs can run higher. A single pipe boot sits at the low end; a rebuilt valley or extensive flashing work sits at the high end. A free inspection gives you the exact number for your roof.
- FEMA, disaster declaration DR-4757-MI, Michigan severe storms of August 2023 (Macomb County designated). fema.gov/disaster/4757
- Manufacturer technical and warranty literature for the major asphalt shingle lines: GAF (gaf.com), Owens Corning (owenscorning.com), and CertainTeed (certainteed.com).
- National Roofing Contractors Association, technical guidance for steep-slope roof systems. nrca.net
- IICRC S500, Standard for Professional Water Damage Restoration: drying framing, insulation, and drywall before closing an assembly. iicrc.org