
JUMP TO A SECTION
Our main leak-tracing guide makes the case that water enters uphill of where it shows and works backward from there. The attic is where that backward walk actually happens. It is the one place in the house where the underside of the roof deck, the rafters, and the insulation are all exposed at once, with nothing hiding the path the water took to get from the failed shingle to your ceiling. Standing in the attic with a flashlight is not glamorous work, but it is usually the difference between a repair aimed at a guess and a repair aimed at the actual hole.
01 / THE SHORT ANSWERWhat tracing in the attic accomplishes
The goal of an attic trace is narrow and specific: find the highest, driest-to-wettest point along the water's path, because that point sits closest to the true entry on the roof above it. Water lands on top of the deck, follows the slope and the wood grain, and runs down the underside until a rafter, a seam, or a low point catches it and sends it toward the drywall. Every foot that water travels before it drips is a foot between the ceiling stain and the actual leak, so working from the stain straight up through the insulation and along the framing, rather than assuming the leak sits directly overhead, is the entire method.
Follow the trail uphill until it stops getting wetter. The spot where the staining or dampness is most pronounced, closest to the ridge, is your working location. Anything past that point, further uphill, should be dry. That transition line is what you are hunting for.
02 / BEFORE YOU CLIMBBefore you climb up
A few minutes of prep keeps an attic trace from turning into a second problem. Bring a bright flashlight or headlamp, kneepads or a scrap of plywood to kneel on, and pick a day right after a rain, or run a garden hose on the roof for twenty minutes first, so any active leak is still showing wet rather than having dried between the drip and your inspection.
- Walk the joists, never the drywall. Ceiling drywall or insulation will not hold your weight; step only on the framing members, and lay a board across two joists if you need to kneel in one spot.
- Watch for nail tips. Roofing nails driven from above poke through the deck into the attic, and a stray hand or knee finds them fast in low light.
- Mind the insulation depth. Deep blown-in insulation can bury the joists themselves, so probe with your foot before you commit weight, and never step where you cannot see the framing underneath.
- Kill the lights, look for daylight. With the attic dark, a pinpoint of daylight through the deck is one of the clearest signs of an actual gap, not just an old stain.
Timing matters as much as tools. An attic that has been baking dry for a week gives you almost nothing to read; any old stain looks the same as it did the last time you checked, and there is no way to tell whether the source is still active. Going up during a steady rain, or within an hour or two after one ends, or running a hose on a dry roof and having someone watch the attic from inside while another person moves the water slope by slope, are the three windows that actually show you something moving. Bring a phone to photograph anything you find in place, before you touch it or move insulation aside, since the exact position and shape of a stain is part of the evidence.
It is also worth a note on what not to do. Do not pull back insulation broadly hunting for a stain; disturbing insulation you cannot put back correctly the same way creates a second problem, and matted or compressed insulation is itself one of the clues you are trying to read undisturbed. Move slowly, look before you touch, and if the attic is tight, hot, or poorly lit enough that you cannot see the framing clearly, that is the signal to stop and let a free inspection pick it up instead of pushing further into a space that is not safe to work in alone.
03 / THE TRAILReading the water trail
Once you are safely positioned, work in from the general area below the ceiling stain and move upslope, scanning the deck and rafters with the flashlight held at a low angle so shadows show texture instead of washing it out. A handful of specific clues tell you whether you are getting closer or farther from the source.
Stains and discoloration on the deck and rafters
A dark, hard-edged stain is usually an old, already-dried event. A soft, spreading, lighter stain with a fuzzy edge suggests moisture is still active. Follow the stain uphill along the rafter; it will usually track a straight or gently curving line back toward a specific spot, a valley, a penetration, or a run of nails, rather than spreading evenly in every direction.
Rusted nail tips
Scattered light surface rust on nail tips across the attic is normal aging and not a leak by itself. Heavy rust concentrated in one small cluster, especially with visible moisture beaded on the tips, usually sits close to where water is actually getting through the deck, and is one of the most reliable single tells in a trace.
Matted or discolored insulation
Insulation that has been sitting under a leak loses its loft, mats flat, and often darkens. Because insulation does not travel sideways the way water does on a solid deck, a matted patch tends to sit directly under, or very close to, the point where water is passing through the deck above it, which makes it one of the more direct clues in the trail.
Touch test for active versus old moisture
A stain alone does not tell you if a leak is still active. Press a bare hand or the back of your fingers against the suspect wood; damp, cool wood means water is present now, while dry wood with only visible discoloration usually means the moisture has already come and gone, at least for today. Testing during or immediately after rain gives the clearest read.
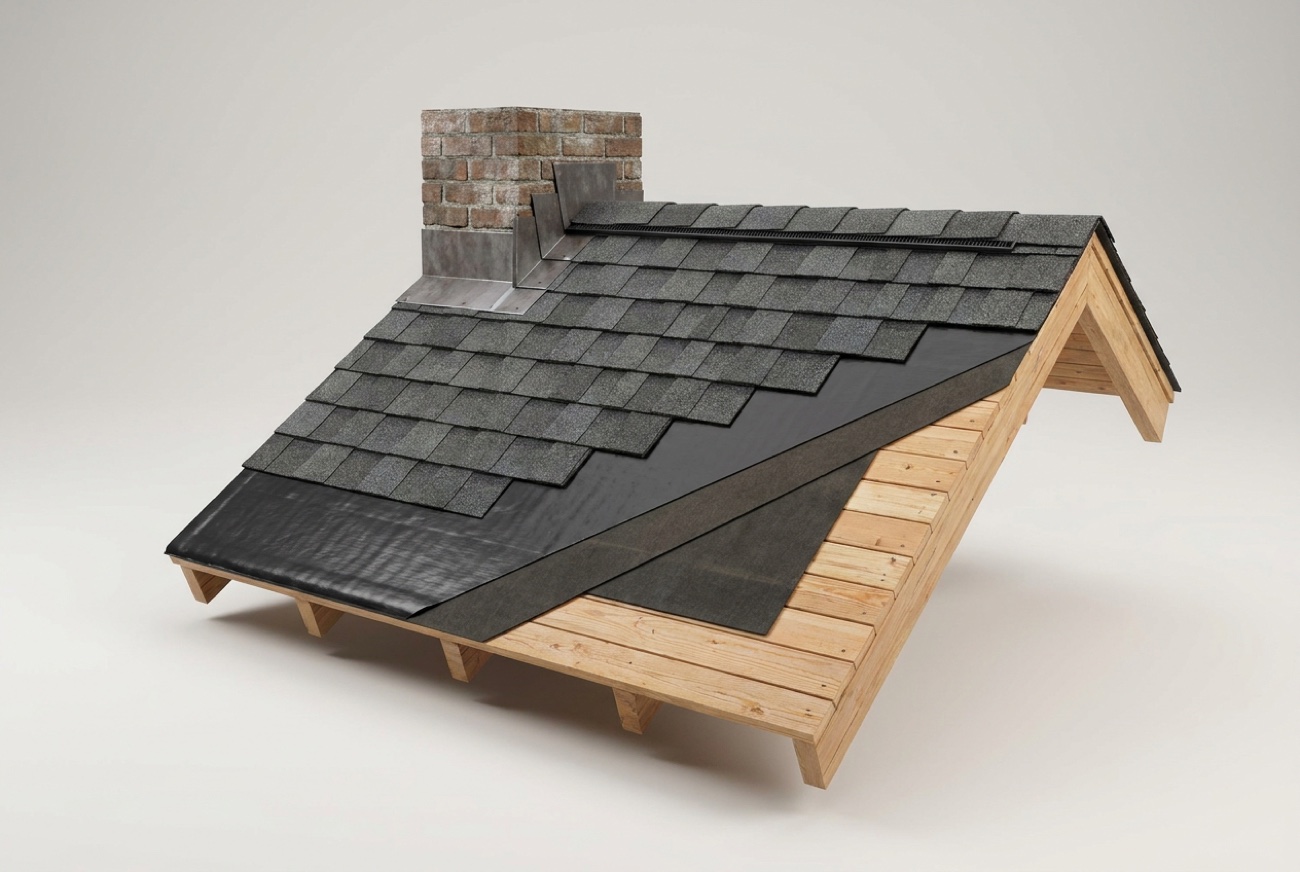
Keep following the trail until the staining, dampness, and any rust or matting stop getting worse and the deck reads clean and dry. That transition point, not the ceiling stain you started from and not a guess at the roof's midpoint, is the working location for the repair.
Where the trail runs also narrows what it is pointing at, before you ever set foot back outside. A trail that climbs straight up a single rafter bay and stops at a consistent point usually points to a discrete failure directly above it, a popped nail, a small gap, a single lifted shingle. A trail that runs at an angle, cutting across several rafters rather than following one straight up, usually means the water is following a valley, a sidewall, or a sloped flashing detail rather than a single point in the field, because those details shed water sideways before it ever reaches the deck below. A trail that seems to come from everywhere near a chimney or a plumbing stack almost always means the flashing around that penetration, not the shingles near it, is the actual source.
| WHAT THE TRAIL LOOKS LIKE | WHAT IT USUALLY MEANS |
|---|---|
| Straight stain up one rafter bay, stops at a point | A discrete failure directly above, such as a popped nail or lifted shingle |
| Trail angles across several rafters | Water shedding sideways off a valley or sidewall flashing before reaching the deck |
| Staining radiating from around a chimney or stack | Flashing around the penetration, not the nearby field shingles |
| Staining concentrated at the eaves, low on the slope | Ice barrier or edge flashing performance, often a winter-specific pattern |
| Trail runs along the ridge line itself | Ridge cap fasteners or ridge vent seal rather than the field below it |
04 / MARK AND MEASUREMark it, then measure it
Finding the spot in the attic only helps if a roofer can find the same spot from outside on the shingles, and the two views do not line up as neatly as people expect once you are standing on a ladder instead of kneeling in the attic. The fix is measuring, not guessing.
- Mark the wet rafter or deck spot with tape, chalk, or a pencil circle so you do not lose it once you move.
- Pick two fixed reference points you can also identify from the roof's surface: a gable end wall, a chimney chase, a plumbing vent stack, or a valley.
- Measure the horizontal distance from each reference point to your marked spot along the joists, and measure the vertical distance down from the ridge.
- Write both numbers down, along with which slope of the roof you were under, so the measurements travel outside with you rather than living only in memory.
Two measurements from two different reference points, rather than one, is what turns a rough location into a precise one; a single distance from a single landmark can still leave several feet of shingle field to search, while a crossed pair of measurements narrows it to roughly one spot. This is the same triangulation a roofer uses when a hose test confirms the leak from outside, described in the main leak-tracing guide.
The most common measuring mistake is picking a reference point that only means something from inside the attic. A distance from an odd piece of ductwork or a random truss brace does you no good once you are standing on the roof, because none of that is visible from up there. Chimneys, plumbing stacks, dormers, gable end walls, and valleys are useful precisely because they are landmarks on both sides of the deck at once; you can point to them from the attic and find the same feature from a ladder. If your roof genuinely has no such landmark near the wet spot, count rafter bays instead, starting from a wall you can also identify outside, and note the count along with your distance measurements.
A photo of the marked spot, taken with your phone before you climb back down, along with a second photo of your tape measure reading against the reference point, does more for a roofer than a verbal description ever will. Bring both to the inspection, or text them ahead of the appointment, and the crew can often confirm the likely shingle before they even get on the roof.
05 / THE LIMITSWhen attic tracing hits a wall
Attic tracing is honest work with honest limits, and it is worth knowing them before you spend an evening in the crawlspace expecting an answer the space cannot give you.
A finished, insulated attic with drywall already up, or a vaulted or cathedral ceiling with no attic space at all, gives you nothing to inspect from underneath; the deck itself is never exposed. Spray foam insulation applied directly to the underside of the deck hides the wood surface the same way, even though the attic is technically open. Blown-in loose fill deep enough to bury the rafters can make it unsafe or impossible to see the deck without disturbing insulation you should not be moving yourself. And on a roof that has already had multiple patch repairs over the years, old stains from past, already-fixed leaks can sit right next to a new one, and telling them apart from the attic side alone gets genuinely difficult.
In any of those situations, the trail does not stop, it just moves outside. A pro picks it back up with a controlled hose test from the roof's surface, moisture meter readings on the deck and framing where it is accessible, and knowledge of where the same style of roof typically fails, the same method our own crews use when the attic side runs out of clues. If your roof leaks inside a wall cavity rather than showing up on a ceiling, the water is following framing rather than a rafter, and our guide to leaks inside a wall covers that variation specifically.
There is also a category of leak that looks like it should trace easily and does not: the intermittent one. A wet spot that shows up only in a hard, wind-driven rain from one direction, or only during a fast snowmelt, can be bone dry the day you happen to climb up and look. If your attic reads clean but the ceiling stain keeps returning under specific conditions, tracing on a normal dry day will tell you nothing either way, and the useful move is noting exactly what the weather was doing the last few times the stain appeared, wind direction, rain intensity, temperature, since that pattern is often more diagnostic than a single attic visit.
06 / THE NEXT STEPFrom attic finding to fixed roof
Whatever you find, or do not find, in the attic is valuable information to hand to a roofer rather than a finished diagnosis on its own. A marked spot with two measurements lets an inspector go almost straight to the likely shingle or flashing detail instead of walking the whole roof cold. A dry, clean attic with no trail at all is useful too, since it usually points the leak toward a specific penetration, a chimney, or a valley rather than a general field failure, and narrows where an inspector looks first.
It is worth saying plainly what an attic trace is not: it is not a substitute for the repair itself, and it is not a warranty that the spot you marked is the only spot that needs attention. A roof old enough to be leaking in one place has often taken wind and weather everywhere else too, and a thorough inspection checks the whole shingle field, the flashing at every valley and penetration, and the gutters, not just the one location your trace pointed to. Treat your attic notes as the fastest way to get an inspector looking in the right place first, not as the final word on what the roof needs.
Our free inspection covers both ends of the trail: the attic side of the deck and the shingle field, flashing, and penetrations above it, tied together with photos. If a leak left standing too long, our guide to attic mold after a roof leak covers what chronic moisture does to the wood and insulation over time, and why source-first repair always comes before any remediation. Once the true entry point is confirmed, most Macomb County roof repairs run $350 to $3,200 depending on scope, and larger or complex repairs can run higher, the same ranges quoted on our roof repair service page. You can start from the instant estimator, check our published ranges on the pricing page, or run your own numbers on the 60-second cost calculator.
- Work from the ceiling stain uphill through the attic; the highest point where staining, dampness, rust, or matting is still present sits closest to the true entry.
- Walk only the joists, watch for protruding nail tips, and time the trace right after rain or a hose test so an active leak still shows wet.
- Stains, rusted nail tips, matted insulation, and a hands-on touch test are the four clues that tell you which direction to keep tracing.
- Mark the spot and measure it from two fixed references, like a chimney or gable wall, so a roofer can find the exact shingle from outside.
- Finished attics, vaulted ceilings, spray foam, and deep blown-in insulation can all stop an attic trace cold; a pro picks it back up from the roof's surface.
Questions we hear most
No, but any notes you can gather help. If you can safely see a stain, rust, or damp insulation in the attic and mark roughly where it sits, that shortens the time an inspector spends locating the source. If your attic is finished, vaulted, or feels unsafe to walk, skip it and let a free inspection handle the tracing instead.
Water runs downhill along the underside of the deck and down rafters before it drips, so the entry point on the shingles is almost always uphill, and often several feet away, from wherever the wet spot or stain shows up in the attic. Tracing the trail to its highest, driest-to-wettest transition point is how you get closer to the actual source.
That happens, especially with finished attics, vaulted ceilings, or insulation too deep to inspect safely. A dry attic does not mean there is no leak; it usually means the trace needs to continue from the roof's surface with a controlled hose test, which is exactly what a free inspection is built to do.
- FEMA, disaster declaration DR-4757-MI, Michigan severe storms of August 2023 (Macomb County designated). fema.gov/disaster/4757
- InterNACHI Standards of Practice for home inspections (scope of a generalist roof inspection). nachi.org/sop
- U.S. Occupational Safety and Health Administration, fall protection requirements for roofing work. osha.gov
- Michigan Residential Code 2015, section R905.2 Asphalt Shingles: fastening, slope, and underlayment application requirements. up.codes: MRC chapter 9