
JUMP TO A SECTION
Ask two roofers what their inspection covers and you will usually get two different answers, delivered with equal confidence. That is not because roofing is mysterious. It is because most homeowners have no reference point to check the answer against, so a fifteen-minute look from the driveway and a genuine forty-five-minute walk of the roof, the flashing, and the attic both get called an inspection. The fix is a written standard. Below is the 21-point checklist a thorough roof inspection covers in Macomb County, organized into five zones the way water actually moves through a roof: the shingle field, the flashing and penetrations, the edges and drainage, the attic side of the deck, and the structure underneath all of it. This is the same list our own inspectors document on every visit, and it is free to have someone run it on your roof, the same visit described in full on our roof inspection service page.
01 / THE SHORT ANSWERWhat a real 21-point inspection covers
A thorough roof inspection is not one pass over the shingles. It is five zones checked in sequence, because a leak's entry point and its symptom are rarely in the same place. Water gets in at a flashing detail or a cracked shingle, runs along the underside of the deck, and shows up on a ceiling several feet away. An inspection that skips the attic side, or never checks how the edges shed water, is only reading half the roof.
shingle field (7 points), flashing and penetrations (6 points), edges and drainage (4 points), the attic side (3 points), and structure (1 point). Every point below is something a Macomb Roofing Pros inspection documents with a photo, at no cost to you.
Why Michigan matters to this list specifically: freeze-thaw cycling is harder on a roof than steady cold or steady heat ever is. Water that gets into a crack, a seam, or a fastener hole expands by roughly nine percent when it freezes, and Macomb County can swing through dozens of freeze-thaw cycles in a single winter. Each cycle widens whatever opening the water found. A flaw that would sit quietly for years in a milder climate gets worked open here, which is exactly why several points on this list call out freeze-thaw by name rather than treating every roof the same regardless of region.
02 / ZONE 1The shingle field: 7 points
The shingle field is the roof's outer skin and the easiest zone to see, but seeing it and reading it correctly are different skills. A wearing pattern that looks alarming from the ground is sometimes cosmetic, and a subtle one is sometimes the roof's clearest warning sign. Our shingle inspection guide goes deeper on reading these signs; here is what an inspector is checking, point by point.
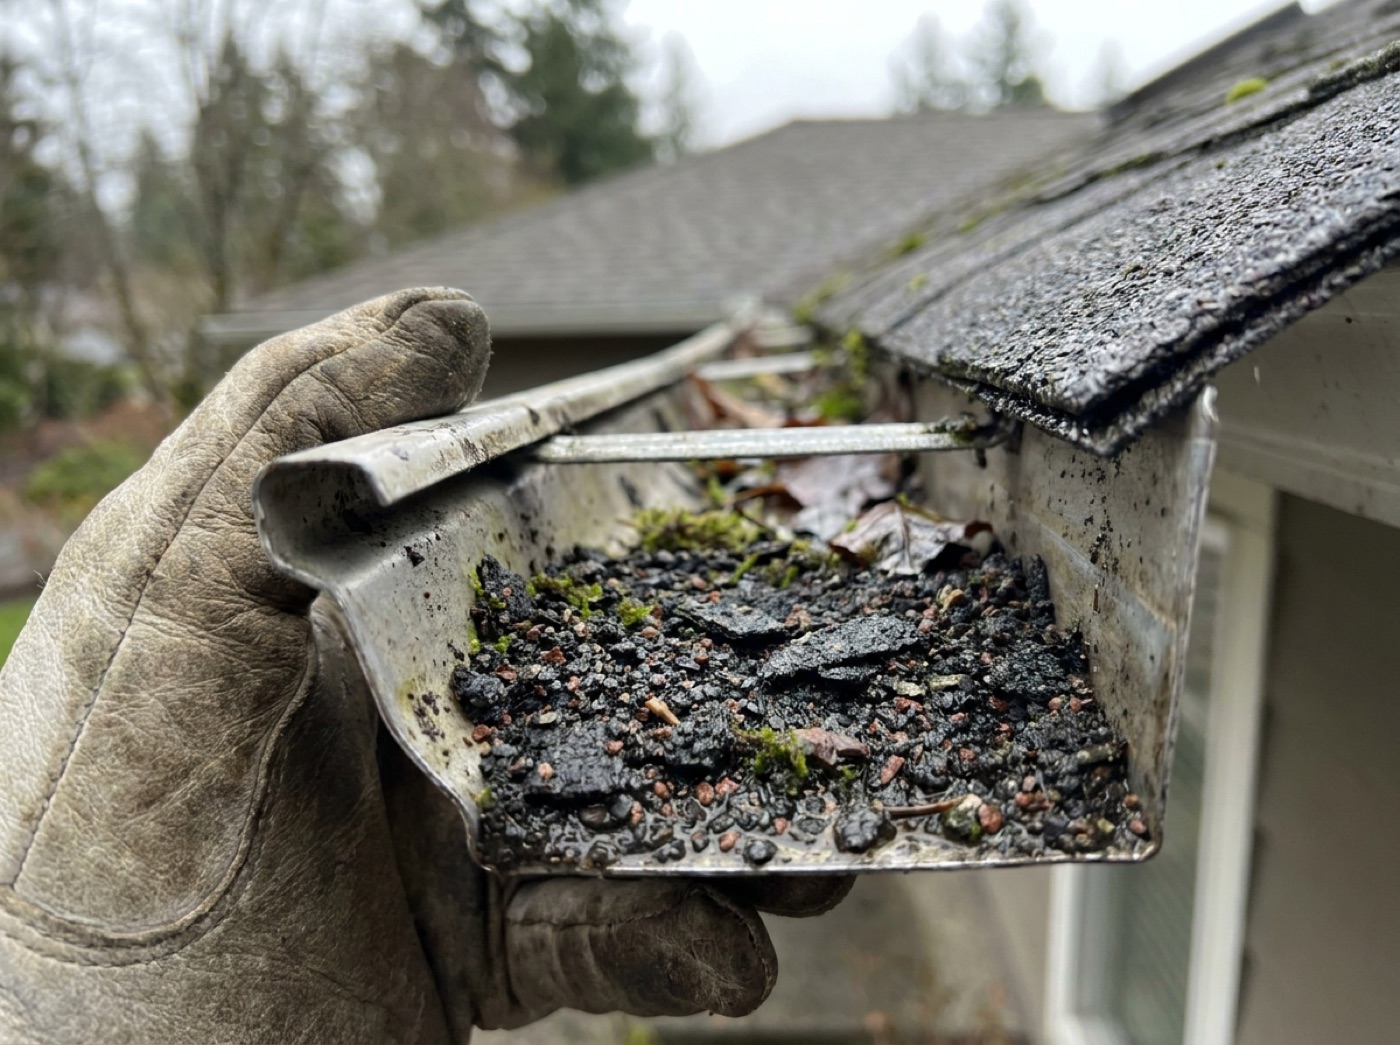
- 1. Granule loss and wear pattern. Asphalt shingles shed their protective granules as they age, and a scattering in the gutters is normal. Bald patches on the shingle surface itself are not. Uneven wear, heavier on one slope than another, usually points to sun exposure or a ventilation imbalance rather than simple age.
- 2. Curling and cupping. Shingle edges or corners that lift away from the roof plane are losing their seal, and a curled shingle is more vulnerable to wind getting underneath it. Freeze-thaw accelerates curling because trapped moisture in an aging shingle expands and contracts with every cycle, stressing the mat a little more each time.
- 3. Cracking and thermal splits. Straight-line cracks that run through a shingle, often in the same spot across several courses, come from the shingle mat expanding and contracting through Michigan's wide seasonal temperature swings until it fatigues and splits. Once cracked, a shingle no longer sheds water reliably at that spot.
- 4. Lifted, torn, or missing tabs from wind. Wind gets under a shingle edge where the factory seal strip has failed or never fully bonded, and once one tab lifts, the exposed nail holes and underlayment below are directly exposed to the next rain. An inspector checks not just for missing shingles but for tabs that lifted and reset, since those often reseal poorly on their own.
- 5. Exposed or backed-out nail heads. A nail driven at the wrong angle, or one that works itself upward as the deck expands and contracts seasonally, leaves a small gap that is a direct path for water. Backed-out nails are common on roofs that have been through several freeze-thaw winters and are an easy miss from ground level.
- 6. Blistering. Small raised bubbles in the shingle surface, usually from trapped moisture or manufacturing air pockets, that eventually pop and expose the mat underneath. Blistering tends to show up first on the sun-exposed slopes and is an early sign the shingle surface is breaking down.
- 7. Moss, algae, and lichen growth. Dark streaking is usually cosmetic algae staining. Moss is a different problem: it holds moisture directly against the shingle and can physically lift edges as it grows, and in a freeze-thaw climate that trapped moisture is exactly what accelerates the damage described above. Our guide to black streaks and moss covers telling the two apart.
03 / ZONE 2Flashing and penetrations: 6 points
Flashing failures cause a disproportionate share of roof leaks relative to how little roof area they actually cover, because every flashing detail is a deliberate seam in an otherwise continuous surface. Our roof flashing inspection guide covers each type in more depth. Here is what an inspector probes and sights on every visit.
- 8. Chimney counter-flashing. The metal that tucks into the mortar joints of a chimney and laps over the roof-level step flashing below it. Mortar erodes over the years and lets counter-flashing pull loose, and a probe check confirms it is still seated rather than just visually present.
- 9. Step flashing at sidewalls. Small L-shaped metal pieces woven between shingle courses wherever a roof plane meets a vertical wall. A single piece rusted through or a section replaced with a bead of caulk instead of proper metal is a common, hard-to-see leak source.
- 10. Valley metal. The channel where two roof planes meet, carrying more concentrated water flow than anywhere else on the roof. Inspectors check for granule buildup that traps water, metal that has corroded thin, and shingles cut too close to the valley center line.
- 11. Drip edge at eaves and rakes. The metal edging that directs water off the roof into the gutter rather than back underneath the fascia. Missing or bent drip edge lets water wick backward, especially where ice builds at the eave in winter and has nowhere clean to drain.
- 12. Pipe boots and vent collars. The rubber boots sealing plumbing vents and exhaust pipes are one of the shortest-lived parts of any roof, typically splitting from UV exposure and freeze-thaw within ten to fifteen years. A cracked boot is one of the most common single leak sources we find.
- 13. Skylight curb flashing and glazing seals. Skylights combine a flashing detail with a glass or plastic seal, and both age at different rates. Inspectors check the curb flashing the same way as any wall penetration and separately check the glazing seal itself for cracking or fogging between panes.
Flashing checks take longer than a visual scan of the shingle field because several points require a probe or a lift, not just a look. A ground-level or drive-by inspection can miss all six flashing points entirely. If an inspector never gets on the roof, ask specifically how the flashing was checked.
04 / ZONE 3Edges and drainage: 4 points
The roof edge is where a roof's drainage plan either works or fails, and it is also one of the easiest zones to read from the ground with binoculars, which makes it a good starting point for a homeowner's own visual check before calling anyone.
- 14. Soffit condition. Peeling paint, staining, or sagging soffit panels under the eaves usually mean water is escaping somewhere above and running along the underside of the roof edge rather than into the gutter where it belongs.
- 15. Fascia condition. The board the gutters mount to. Rot here is often a slow leak from a failed drip edge or a gutter that has been overflowing at that spot for more than one season, and soft fascia will not hold gutter hangers reliably.
- 16. Gutter attachment and pitch. Gutters that have pulled away from the fascia, sag between hangers, or lost their slight pitch toward the downspout stop functioning as drainage and instead hold standing water directly against the roof edge, which is exactly the wrong condition heading into a freeze.
- 17. Downspout discharge point. Water that reaches the downspout still needs somewhere to go. A downspout dumping against the foundation or into a clogged extension sends water right back toward the house instead of away from it.
None of these four points are about the roof surface itself, but all four determine whether water that successfully sheds off the shingles actually leaves the property, which is the whole point of a roof in the first place.
05 / ZONE 4The attic side: 3 points
Most homeowners picture a roof inspection happening entirely on top of the house. A thorough one spends real time underneath it too, because the attic side of the deck confesses problems the shingle field never shows. Our attic-side inspection guide walks this checklist in more detail.
- 18. Daylight or pinholes at the deck. A flashlight sweep of the underside of the roof deck, looking for any point of daylight coming through, which marks a hole, a missed nail, or a gap that will eventually let water in even if it has not yet.
- 19. Stained or discolored sheathing. Water stains on the underside of the deck are a record of past or ongoing leaks, and their location, size, and how dark or fresh they look tell an inspector roughly where above they originate and whether the problem is active.
- 20. Insulation condition and baffle clearance. Compressed, wet, or displaced insulation loses its R-value exactly where it matters most, and insulation pushed over the soffit intake blocks the airflow the roof deck needs to stay cold and dry through a Michigan winter.
In a freeze-thaw climate, the attic side matters even more than in milder regions, because a warm, poorly ventilated attic melts snow from underneath the roof, and that meltwater refreezes at the cold eave, backing up under the shingles as an ice dam. Rusted nail tips visible from below and a musty smell are both indirect but useful signals that this zone deserves a closer look, even before any staining is visible.
06 / ZONE 5Structure: 1 point
The fifth zone is a single point, but it is the one that changes everything else about a job's scope if it turns up a problem.
- 21. Ridge line and rafter or truss condition. A visual sight down the ridge from the ground or the attic, checking for any dip or wave in what should be a straight line, paired with an attic-side look at the rafters or trusses themselves for cracking, splitting, or old repairs. A cosmetic sag from decades-old lumber is a different finding than active structural movement, and telling the two apart is the reason this point exists on its own rather than folded into the deck check.
A finding here does not automatically mean a major repair. It means the scope of whatever comes next, repair or replacement, gets priced with the real picture in hand instead of a guess made from the driveway.
07 / USING THE LISTHow to use this checklist on your own roof, or someone else's inspection
You do not need a ladder to get value from this list. From the ground, with binoculars, you can reasonably eyeball points 1 through 7 on the shingle field, most of zone 3's edges and drainage, and the ridge line check in zone 5. What you cannot safely or accurately check from the ground is flashing detail, pipe boots, and anything on the attic side, and that gap is exactly why a professional walk-through exists.
If you already have a quote or a report from another inspector, this list is a fair way to check its depth. Ask which of the 21 points were actually checked, not just the shingle field zone that is easiest to photograph from a drone or the driveway. A report that only covers zone 1 is not wrong, exactly, but it is incomplete, and incomplete is where surprise repair costs come from later.
It also helps to ask how each point was checked, not just whether it was mentioned. A flashing line item that says only flashing okay is not the same finding as a photo showing a probe test at the chimney counter-flashing and the valley metal. The difference matters most on an older roof, where a single overlooked flashing detail or a quietly compressed section of attic insulation can be the reason a quote comes back thousands of dollars different from the one next door, even on a similar house.
| ZONE | WHAT IT CATCHES | HOW IT IS CHECKED |
|---|---|---|
| 1. Shingle field | Age, wear, wind and thermal damage | Visual, walked or via drone |
| 2. Flashing & penetrations | The most common actual leak sources | Probed and sighted on the roof |
| 3. Edges & drainage | Whether shed water actually leaves the property | Visual from ladder or ground |
| 4. Attic side | Leaks, moisture, and ventilation problems | Flashlight sweep under the deck |
| 5. Structure | Whether the frame itself is sound | Ridge sight line plus attic-side look |
Our own inspectors run all five zones and all 21 points on every visit, whether the roof turns out to need nothing, a repair in the $350 to $3,200 range, or a full replacement. What you get afterward is a written report with photos tied to whichever points turned up a finding, not a verbal impression. If every point comes back clean, that is the report, and there is no invented problem to justify the visit. For a walkthrough of what the visit itself looks like start to finish, see our guide to what happens during a roof inspection.
A checklist only means something if someone will show it to you before they climb the ladder, and hold themselves to every point on it after they come down.
The inspection itself is $0 with no obligation, runs on the same 21 points every time, and takes most homes under an hour. You can start one from the instant estimator, and if you are already comparing costs for whatever the inspection might turn up, the cost calculator and our honest pricing sheet use the same published ranges as the rest of this site.
- A thorough inspection covers 21 points across five zones: shingle field (7), flashing and penetrations (6), edges and drainage (4), the attic side (3), and structure (1).
- Freeze-thaw cycling in Macomb County accelerates several of these failures specifically, from shingle curling to attic-side ice dam risk, faster than a milder climate would.
- Flashing and attic-side checks are the two zones most often skipped by a rushed or drive-by inspection, and they are also where the most consequential findings tend to hide.
- You can visually pre-check roughly half the list yourself from the ground; the rest needs someone on the roof and in the attic.
- Our inspection runs all 21 points on every visit, costs $0, and comes with a written photo report whether the news is good or bad.
Questions we hear most
Yes. Every point in this guide, across all five zones, is something our inspectors check and document with photos on every visit, at no cost and with no obligation to hire us afterward.
You can reasonably eyeball the shingle field, the edges, and the ridge line from the ground with binoculars. Flashing details, pipe boots, and the attic side are harder to check safely and accurately without getting on the roof and under the deck, which is where a professional inspection adds the most value.
You get a written report with photos showing exactly which of the 21 points turned up a finding, along with a price if it needs a repair or a replacement. If nothing on the list turns up a problem, that is the report, and there is no invented issue to justify the visit.
- National Roofing Contractors Association, technical guidance for steep-slope roof systems. nrca.net
- Michigan Residential Code 2015, section R905.1.2 Ice Barriers: membrane required from the eave edge to not less than 24 inches inside the exterior wall line. up.codes: MRC chapter 9
- Manufacturer technical and warranty literature for the major asphalt shingle lines: GAF (gaf.com), Owens Corning (owenscorning.com), and CertainTeed (certainteed.com).