
JUMP TO A SECTION
Homeowners describe it the same way almost every time: the wind hit hard, and afterward one corner of the roof or a stretch along the ridge looks torn up while the rest of the field looks fine. That pattern is not random and it is not a sign the field is somehow lucky. Wind does not press down evenly on a roof the way rain does. It accelerates around edges and corners and pulls upward on the surface there, and that pulling force, called uplift, is strongest in a few predictable places on every roof shape. Once you understand those places, a lot of storm damage stops looking mysterious and starts looking like physics.
01 / THE SHORT ANSWERWhy the edges fail first, not the field
Every roof has zones where wind pressure is only moderate and zones where it spikes. The moderate zone is the broad, flat interior of each slope, usually called the field. The spike zones sit along the eaves, the rakes at the gable ends, the corners where two edges meet, and the ridge line at the peak. In a straight-line wind event, which is by far the most common kind of wind damage in Michigan, those edge and corner zones can see uplift pressures several times higher than the field sees at the same moment, on the same roof, in the same gust.
That is why a roof can lose shingles at one corner while a wind-facing slope thirty feet away looks completely normal. The shingles in the field were never asked to resist as much force. The shingles at the corner were, and if a seal was already a little weak or a fastener was set a little high, that is exactly where it lets go first.
02 / THE MECHANICSHow wind creates negative pressure on a roof
Think of wind hitting a house as a stream of air that has to go somewhere. Most of it rides up and over the roof plane. As it does, it has to speed up to clear the building, the same way a river speeds up where it narrows around a rock. Faster-moving air exerts less pressure on the surface beneath it than slower-moving air does, so the roof surface where the wind is moving fastest experiences lower pressure above it than the relatively still air trapped in the attic below. That pressure difference does not push the roof down. It pulls it up, which is what roofers and engineers mean by wind uplift.
The field of a roof, the broad middle of each slope away from any edge, is where the airflow is most settled and the pressure difference is smallest. The edges are a different story. At an eave or a rake, the wind stream has to bend sharply around a physical edge, and that bend accelerates the air even more than it was already moving, dropping the pressure further and increasing uplift right at that line. Corners are worse still, because two edges meet there and two accelerating airflows overlap, similar to the way vortices form off the tip of an airplane wing. The ridge gets its own version of the same effect: wind funnels up one slope, compresses at the peak, and separates sharply on the far side, creating another zone of concentrated suction right along the cap.
None of this depends on how strong a specific storm was. It is true of every roof in every wind event, from a stiff breeze to a severe derecho. What changes with storm strength is how much uplift those zones generate, and whether a given shingle, seal, or fastener has enough holding strength left to resist it.
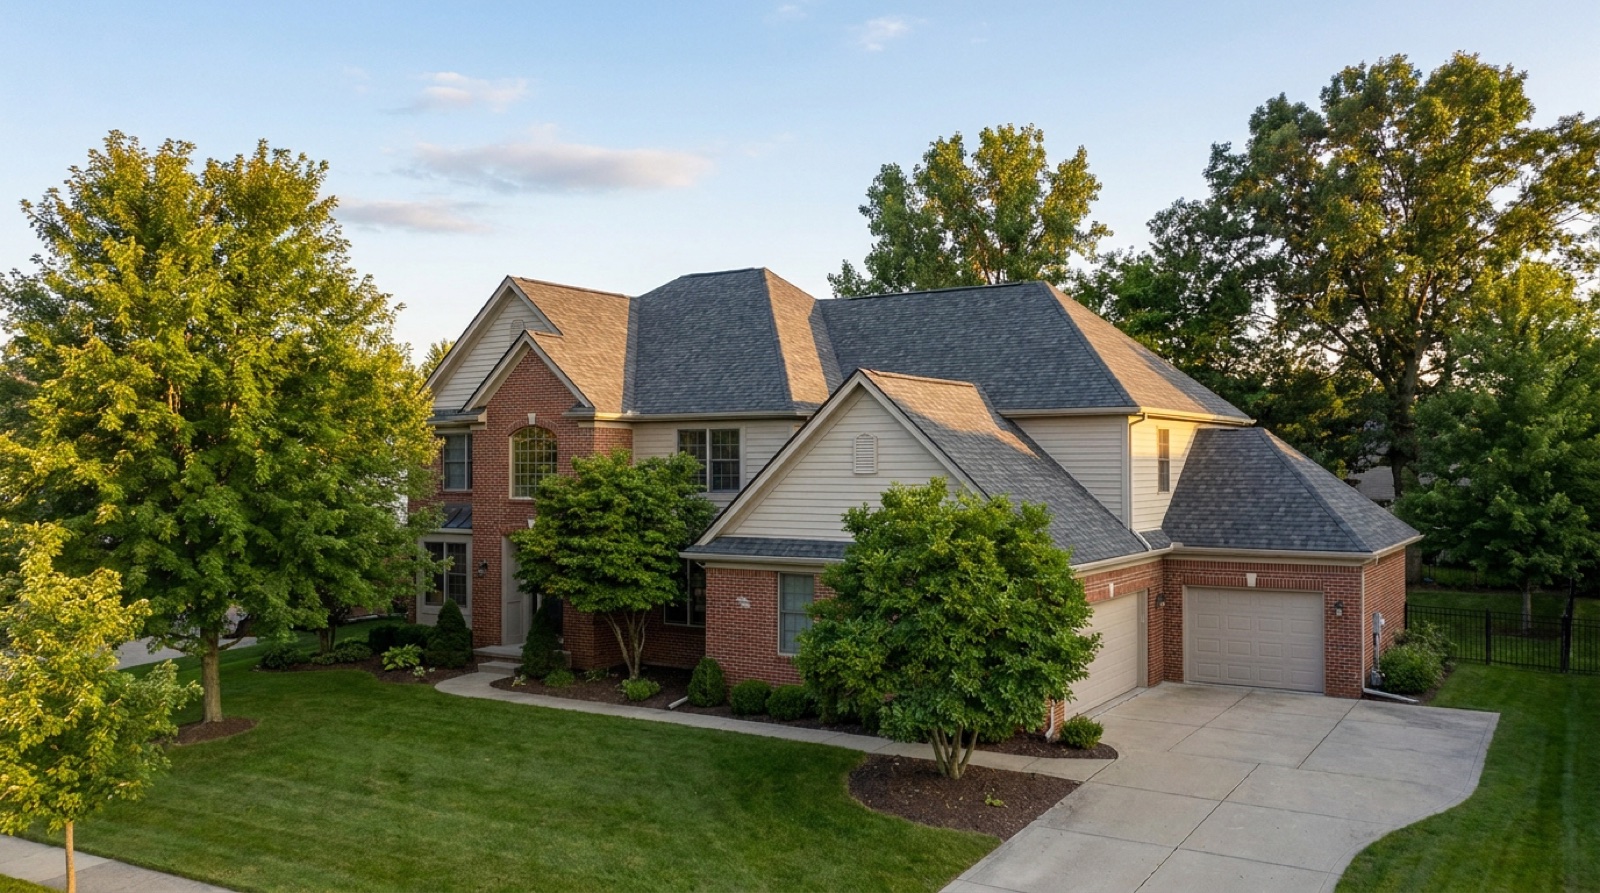
Roof shape changes where the corner-style zones show up, but not the underlying rule. A simple gable roof, the classic triangle shape with two slopes meeting at a ridge, has its highest-pressure zones concentrated at the two lower corners and along the rake edges of the gable ends, since the flat gable wall gives wind an easy edge to accelerate around. A hip roof, where all four sides slope inward to the ridge instead of ending in a vertical gable wall, spreads that same corner effect around all four hip corners instead of concentrating it at two, which is one reason hip roofs are often rated as somewhat more wind resistant in general engineering terms. Either way, the physics is identical: wherever two roof edges meet at an angle, expect the highest uplift on that roof.
03 / THE MAPThe four zones, in order of pressure
Building and wind engineers divide a roof into zones for exactly this reason: uplift is not uniform, so the fastening and detailing should not be uniform either. Here is the practical version of that map, ranked from calmest to most punishing.
| ZONE | WHY IT IS EXPOSED | WHAT FAILS FIRST |
|---|---|---|
| Field (interior of slope) | Settled airflow, smallest pressure swing | Rarely fails first, usually the last area affected |
| Eaves and rakes | Wind bends sharply around a straight edge | Lifted or torn shingle tabs along the edge line |
| Corners | Two accelerating airflows overlap | Highest uplift on the roof; shingles peel back or blow off entirely |
| Ridge | Wind funnels up one slope and separates at the peak | Ridge cap shingles crack, lift, or blow off along the cap line |
A useful shorthand: the calmest part of the roof is also the biggest part of the roof, which is exactly why a field that looks perfect after a storm does not mean the roof came through unharmed. It means the part of the roof least likely to fail did not fail. The parts most likely to fail are smaller, and they are the ones worth checking first.
04 / THE ORDERA check order that follows the physics
Most homeowners scan a roof the way they scan a room: broadly, starting wherever the eye lands. After a wind event, it pays to check in the order the physics predicts trouble, not the order that happens to be easiest to see from the driveway. From the ground, without a ladder, look in this sequence.
- Corners first. Stand where you can see two roof edges meet, at each corner of the house, and look for lifted, torn, or missing shingles right at that intersection. This is the highest-pressure zone on the whole roof and the most likely place to show damage first.
- Ridge line second. Scan the peak of the roof for ridge cap shingles that look cracked, lifted at one edge, or missing outright along a stretch of the cap. Our ridge cap shingle damage guide covers what that specific failure looks like in more detail.
- Rakes and eaves third. Follow the roof's straight edges, both the sloped gable ends and the horizontal eaves, looking for a lifted line of shingles running parallel to the edge itself.
- The field last. Only after checking the three zones above should you scan the broad, flat middle of each slope. Damage here is possible, especially from hail rather than wind, but it is the least likely place for wind uplift specifically to have done its work.
It is also worth remembering that corners and edges are not only found around the outside perimeter of the roof. Anything that breaks up the field creates a small version of the same effect: a dormer, a chimney, a large roof-mounted vent stack, or a plumbing boot cluster all give wind a physical edge to accelerate around, just on a smaller scale than a full building corner. If your roof has any of these features, treat the area immediately around them as its own mini uplift zone worth a look, even though it sits well inside what would otherwise be the calmer field.
This order will not replace a hands-on inspection, and it will not catch everything. A shingle can lift and settle back into place without tearing, leaving a broken seal that is invisible from the ground but still a real weak point in the next wind event. For the full ground-level routine, including what a lifted line actually looks like at a distance, see our guide on checking a roof for storm damage from the ground. What the zone order buys you is a faster, more accurate first look, and a clearer answer for whether a free inspection is worth scheduling.
05 / THE FIXWhy roofers reinforce the edges on purpose
Once you see the zone map, the way a proper roof is installed starts to make more sense. Roofing codes and manufacturer installation instructions call for tighter nailing patterns, extra fasteners, and dedicated starter strip shingles along the eaves and rakes precisely because those lines carry more uplift load than the field does. Ridge cap shingles get their own fastening specification for the same reason: the ridge is a concentrated-pressure zone, not just a decorative cap.
This is also why two roofs installed with the same shingle can perform very differently in the same storm. A crew that runs the standard field nailing pattern all the way to the edge, instead of stepping up the fastener count where the code and the manufacturer specification call for it, is building a roof that is technically finished but under-built for the exact zones most likely to fail first. It rarely shows on a clean-weather walkthrough. It shows in the first serious wind event, at the corner, right on schedule.
If a repair or reroof is on the table after a wind event, ask whether the edge and ridge fastening will be brought up to current specification, not just patched to match what was already there. A repair that copies an under-built edge is a repair that is likely to fail again in the next comparable storm.
Shingle wind ratings work alongside this same logic. Manufacturers test and label products for a wind speed threshold, but that rating is only as good as the installation underneath it, which is why the same shingle can perform very differently on two roofs. A higher wind-rated shingle installed with a standard field nailing pattern all the way to the edge is still an under-built edge zone; a mid-tier shingle installed with the manufacturer's full edge and ridge fastening specification followed can hold up better in exactly the zones covered in this guide. The rating on the wrapper is one input. The fastening at the corners, ridge, and rakes is the other, and it is the one a homeowner can actually ask a contractor to confirm.
06 / THE TAKEAWAYWhat the uplift map means for your roof
The practical upshot is simple: if your home went through a real wind event, do not let a clean-looking field talk you out of checking the edges. Walk the corners, the ridge, and the rakes first, since that is where the pressure was highest and where a marginal shingle, seal, or fastener was most likely tested past its limit. If any of those zones show lifted, torn, or missing shingles, or if you are not confident reading what you are seeing from the ground, that is exactly what a free inspection is for.
It is also worth remembering that uplift damage is not always obvious even at the corner. A shingle can lift a fraction of an inch, break its seal, and settle back down looking nearly normal, which is one reason storm damage can be present without an obvious gap or missing shingle anywhere. Our guides on reading the visible signs of wind damage and on the wind speeds that start causing damage both build on the same zone logic covered here, and are worth reading together with this one if you are trying to size up a specific storm.
The field of a roof is the biggest part and the calmest part. The corners, ridge, and rakes are the smallest parts and the ones doing the hardest work in every gust. Check accordingly.
None of this is about diagnosing your exact roof from a guide. It is about knowing where to look and why, so a five-minute walkaround after a storm is actually useful instead of a guess. If the zones above raise a question you cannot answer from the ground, a free, no-obligation inspection covers the corners, the ridge, the rakes, and the field together, with photos of whatever we find. You can start from the storm damage estimator, get a ballpark on repair costs with the cost calculator, or see the full published ranges on our pricing page.
- Wind uplift is not uniform across a roof; it peaks at corners, then the ridge, then the rakes and eaves, and is weakest in the open field of each slope.
- Corners see the highest pressure because two accelerating airflows overlap there, similar to a wingtip vortex.
- After a wind event, check corners first, then the ridge line, then the rakes and eaves, and only then the field.
- Codes and manufacturer specs call for extra fastening at edges and ridges for this exact reason; a repair that skips it can fail again in the next comparable storm.
- A clean-looking field does not mean a clean roof; a free inspection covers every zone together, with photos.
Questions we hear most
It is an area of a roof, typically the corners, ridge, rakes, and eaves, where wind accelerates around an edge and creates a pressure difference that pulls upward on the roof surface. These zones see significantly higher uplift force than the flat, open field of a slope, which is why storm damage tends to start there first.
Corners sit where two roof edges meet, so two accelerating wind streams overlap there, producing the highest uplift pressure anywhere on the roof, similar to how vortices form at an airplane wingtip. The field, by contrast, sees more settled airflow and a smaller pressure swing, so it is usually the last area to show wind damage.
Those zones are the highest-priority places to look first because they carry the most uplift force, but they are not the only places damage can occur, especially with hail, falling debris, or an already-weak spot elsewhere on the roof. Checking the zones in order gives you a faster, more useful first look, and a free inspection is the way to check the whole roof, including what is not visible from the ground.
- FEMA, disaster declaration DR-4757-MI, Michigan severe storms of August 2023 (Macomb County designated). fema.gov/disaster/4757
- ASCE 7, Minimum Design Loads and Associated Criteria for Buildings and Other Structures: wind uplift zones (field, perimeter, corner) for roofs.
- Manufacturer technical and warranty literature for the major asphalt shingle lines: GAF (gaf.com), Owens Corning (owenscorning.com), and CertainTeed (certainteed.com).